Collecting your sample
Just follow the simple instructions below, or the leaflet included in your kit. You can also follow along with our step-by-step instructional video.

Step-by-step instructions
-
Before you collect your sample
You must read the written instructions and warnings included in the leaflet with your kit before you start to collect your samples.
Collect your samples in the morning Monday-Friday and return them on the same day.
For some tests, additional preparation instructions apply. Please visit our website and select your test to review the 'When to Test' section for important sample collection information.
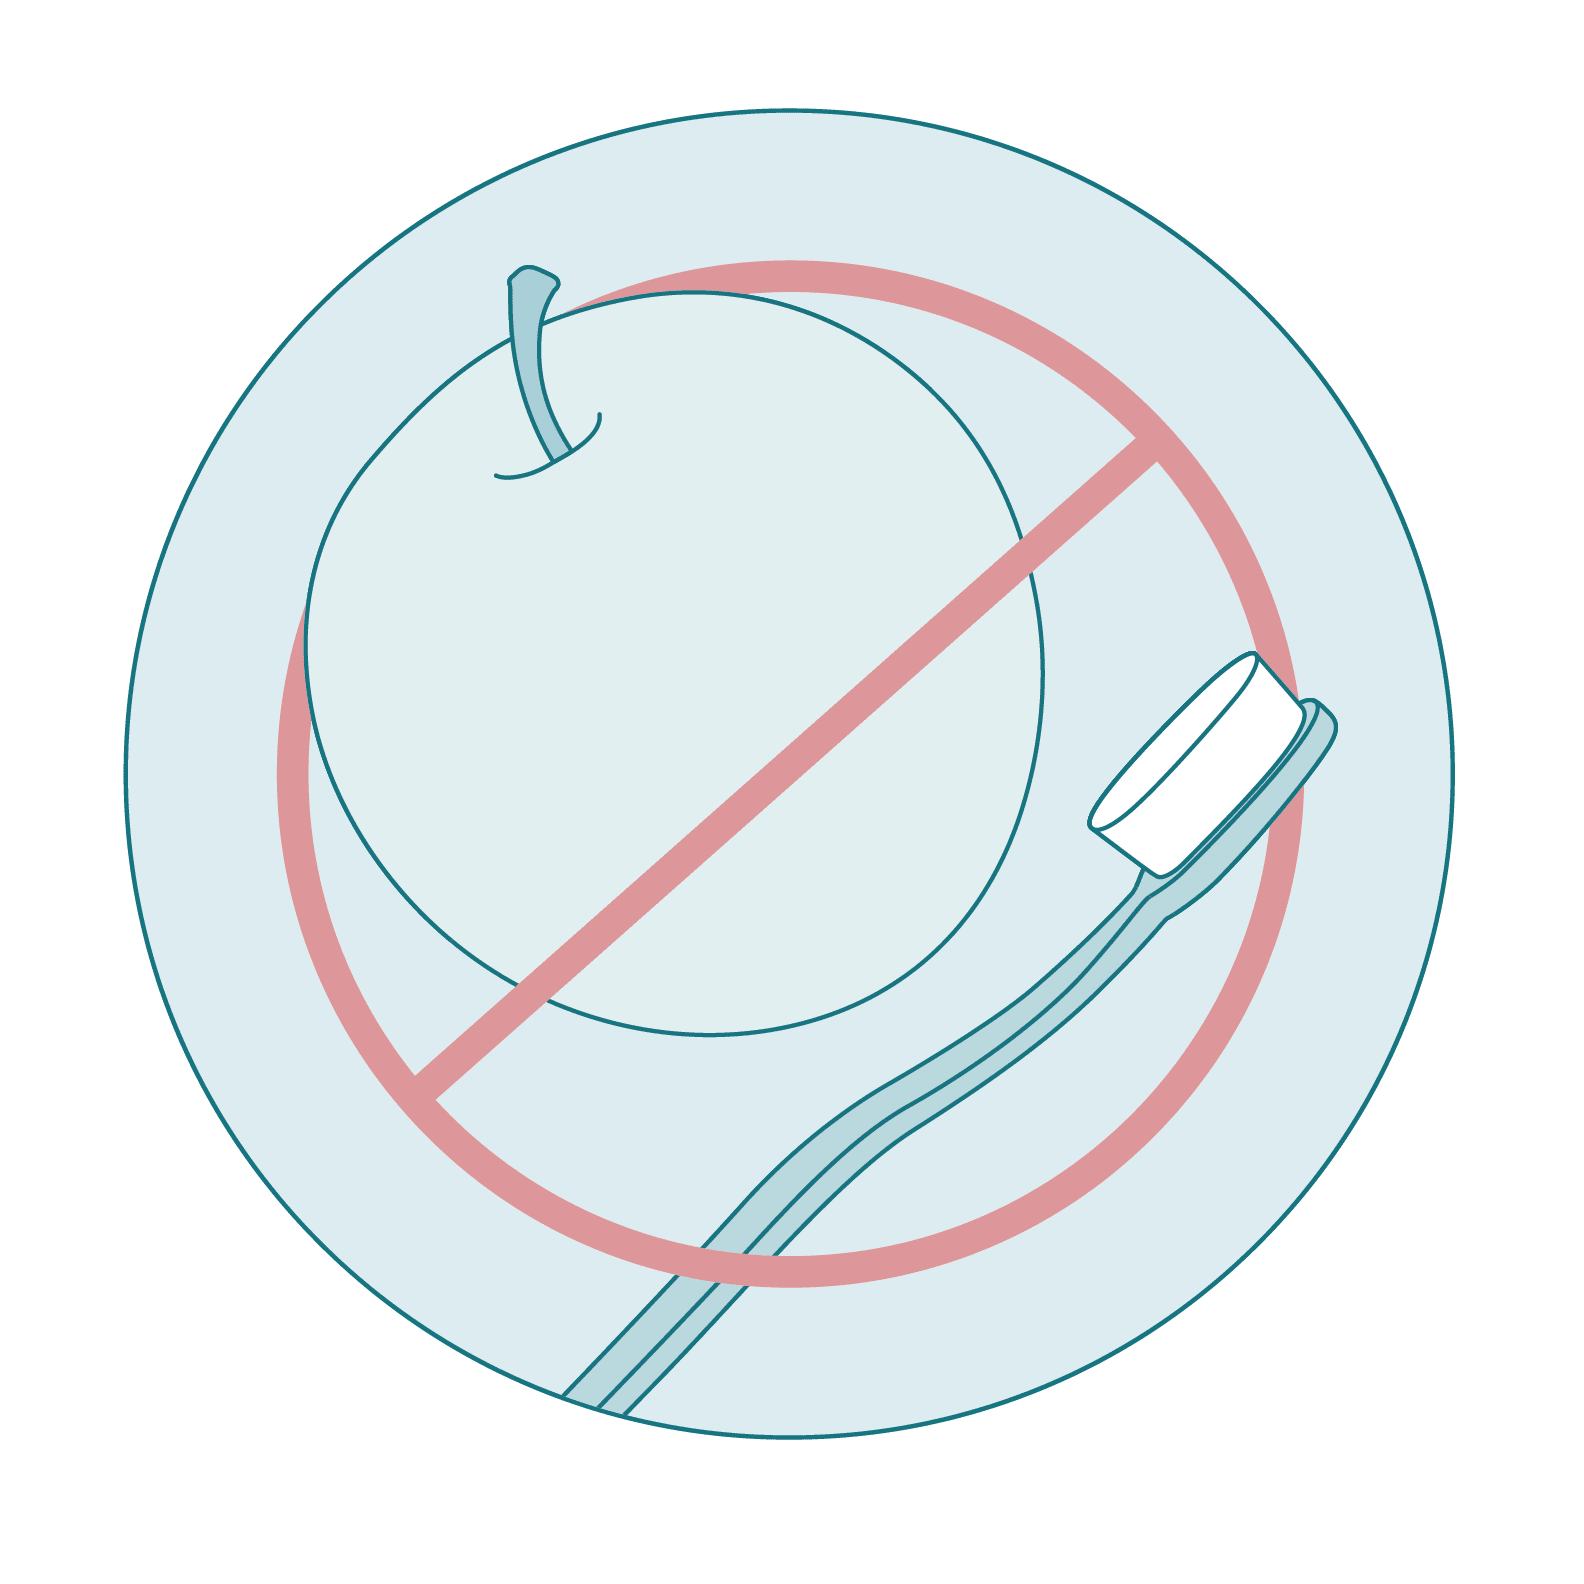
Collect your saliva sample before your blood sample. Collect your saliva sample before you brush your teeth. Do not eat, drink, or take any medication by mouth for 30 minutes prior to sample collection.
Do not take Biotin supplements in the 8 hours before sample collection. -
Activate your test
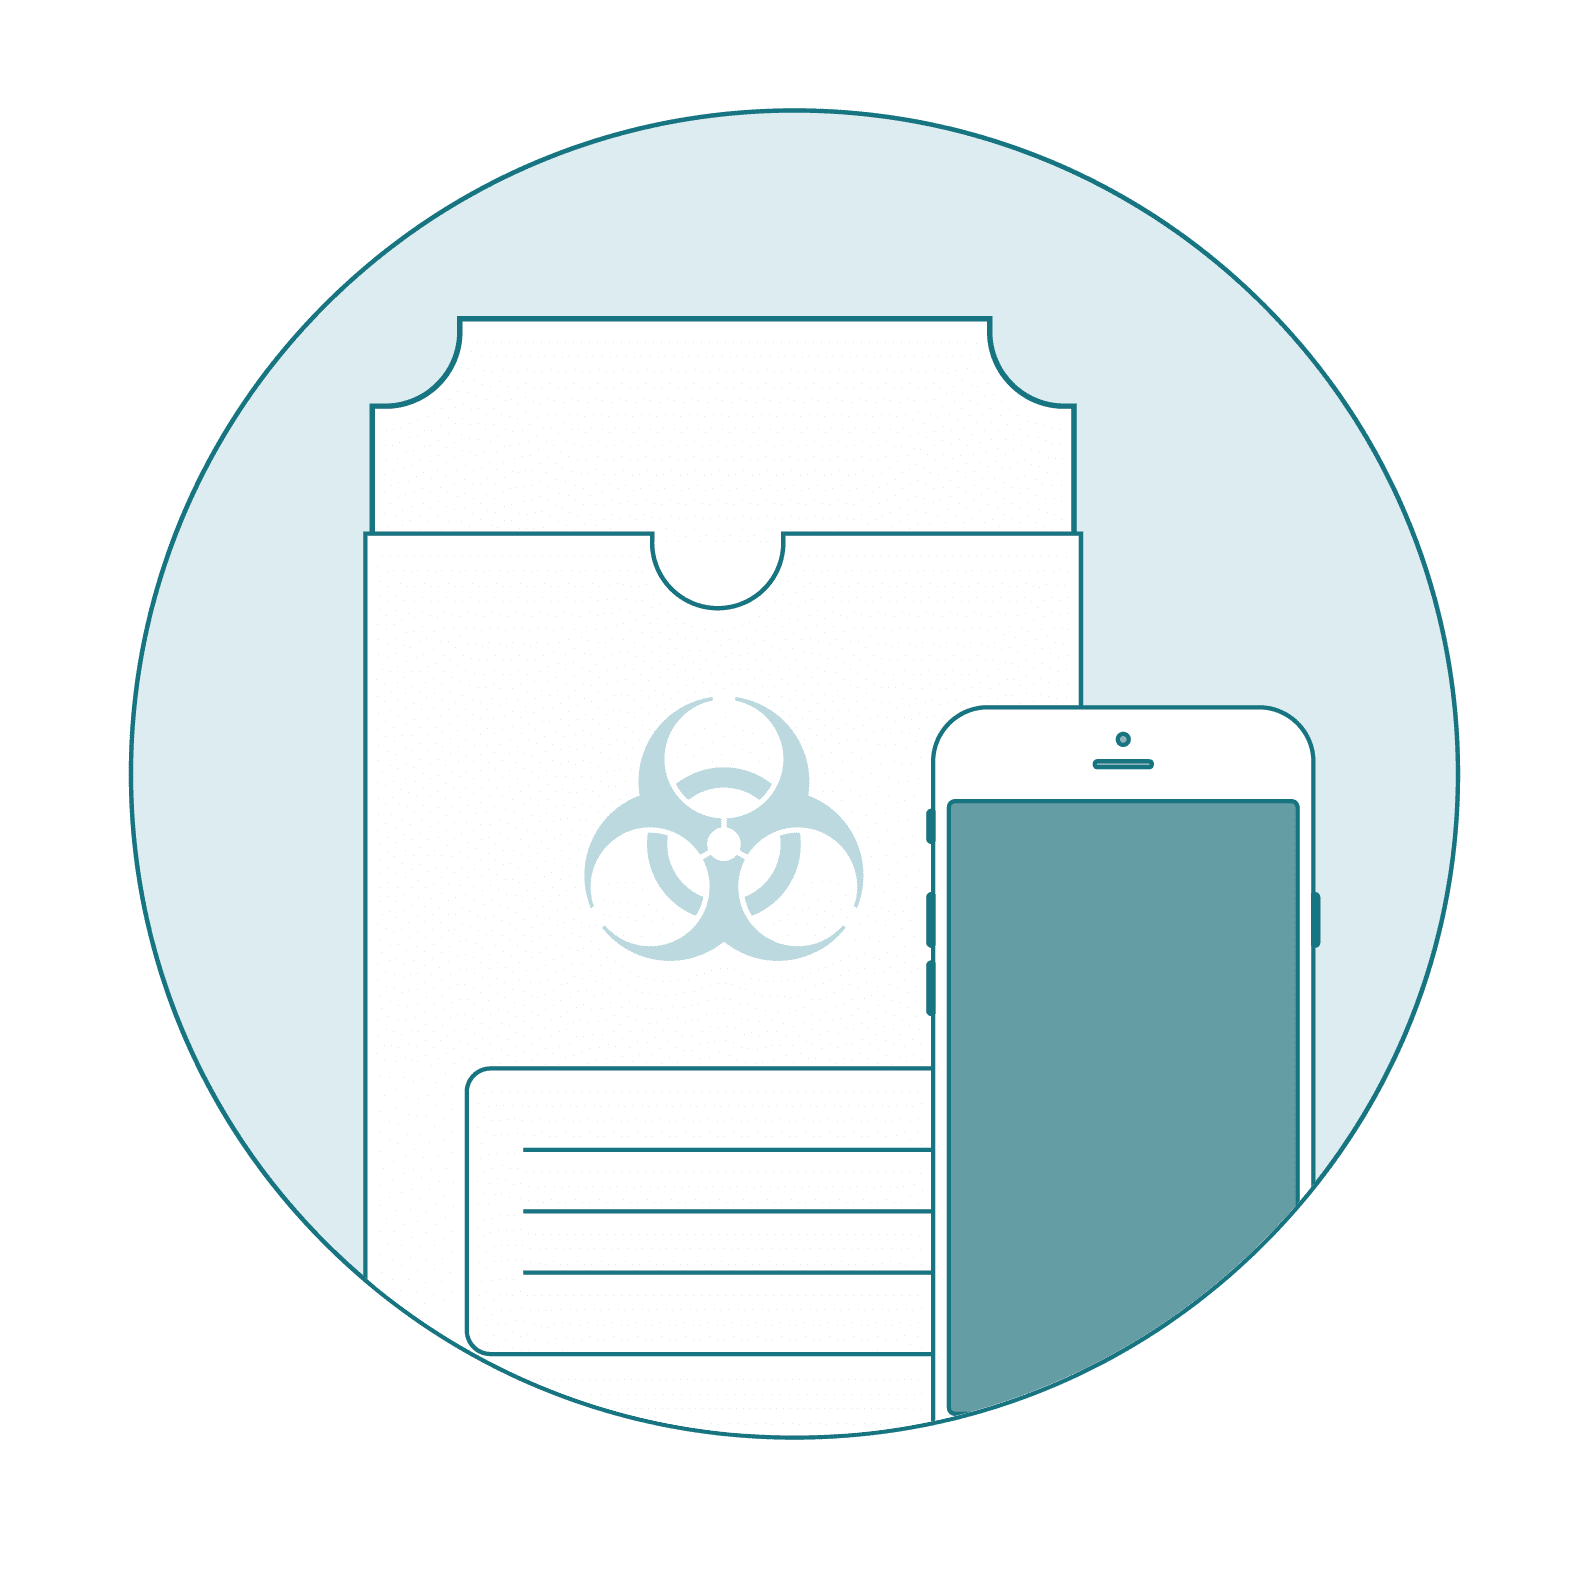
Before collecting your samples, activate your kit on the LetsGetChecked App or online at letsgetchecked.com/active. Your unique activation codes are located on the biohazard bag. Make sure to use your own personal LetsGetChecked account when activating your kit.
The information and samples you provide must be your own.
-
Complete the details on the label
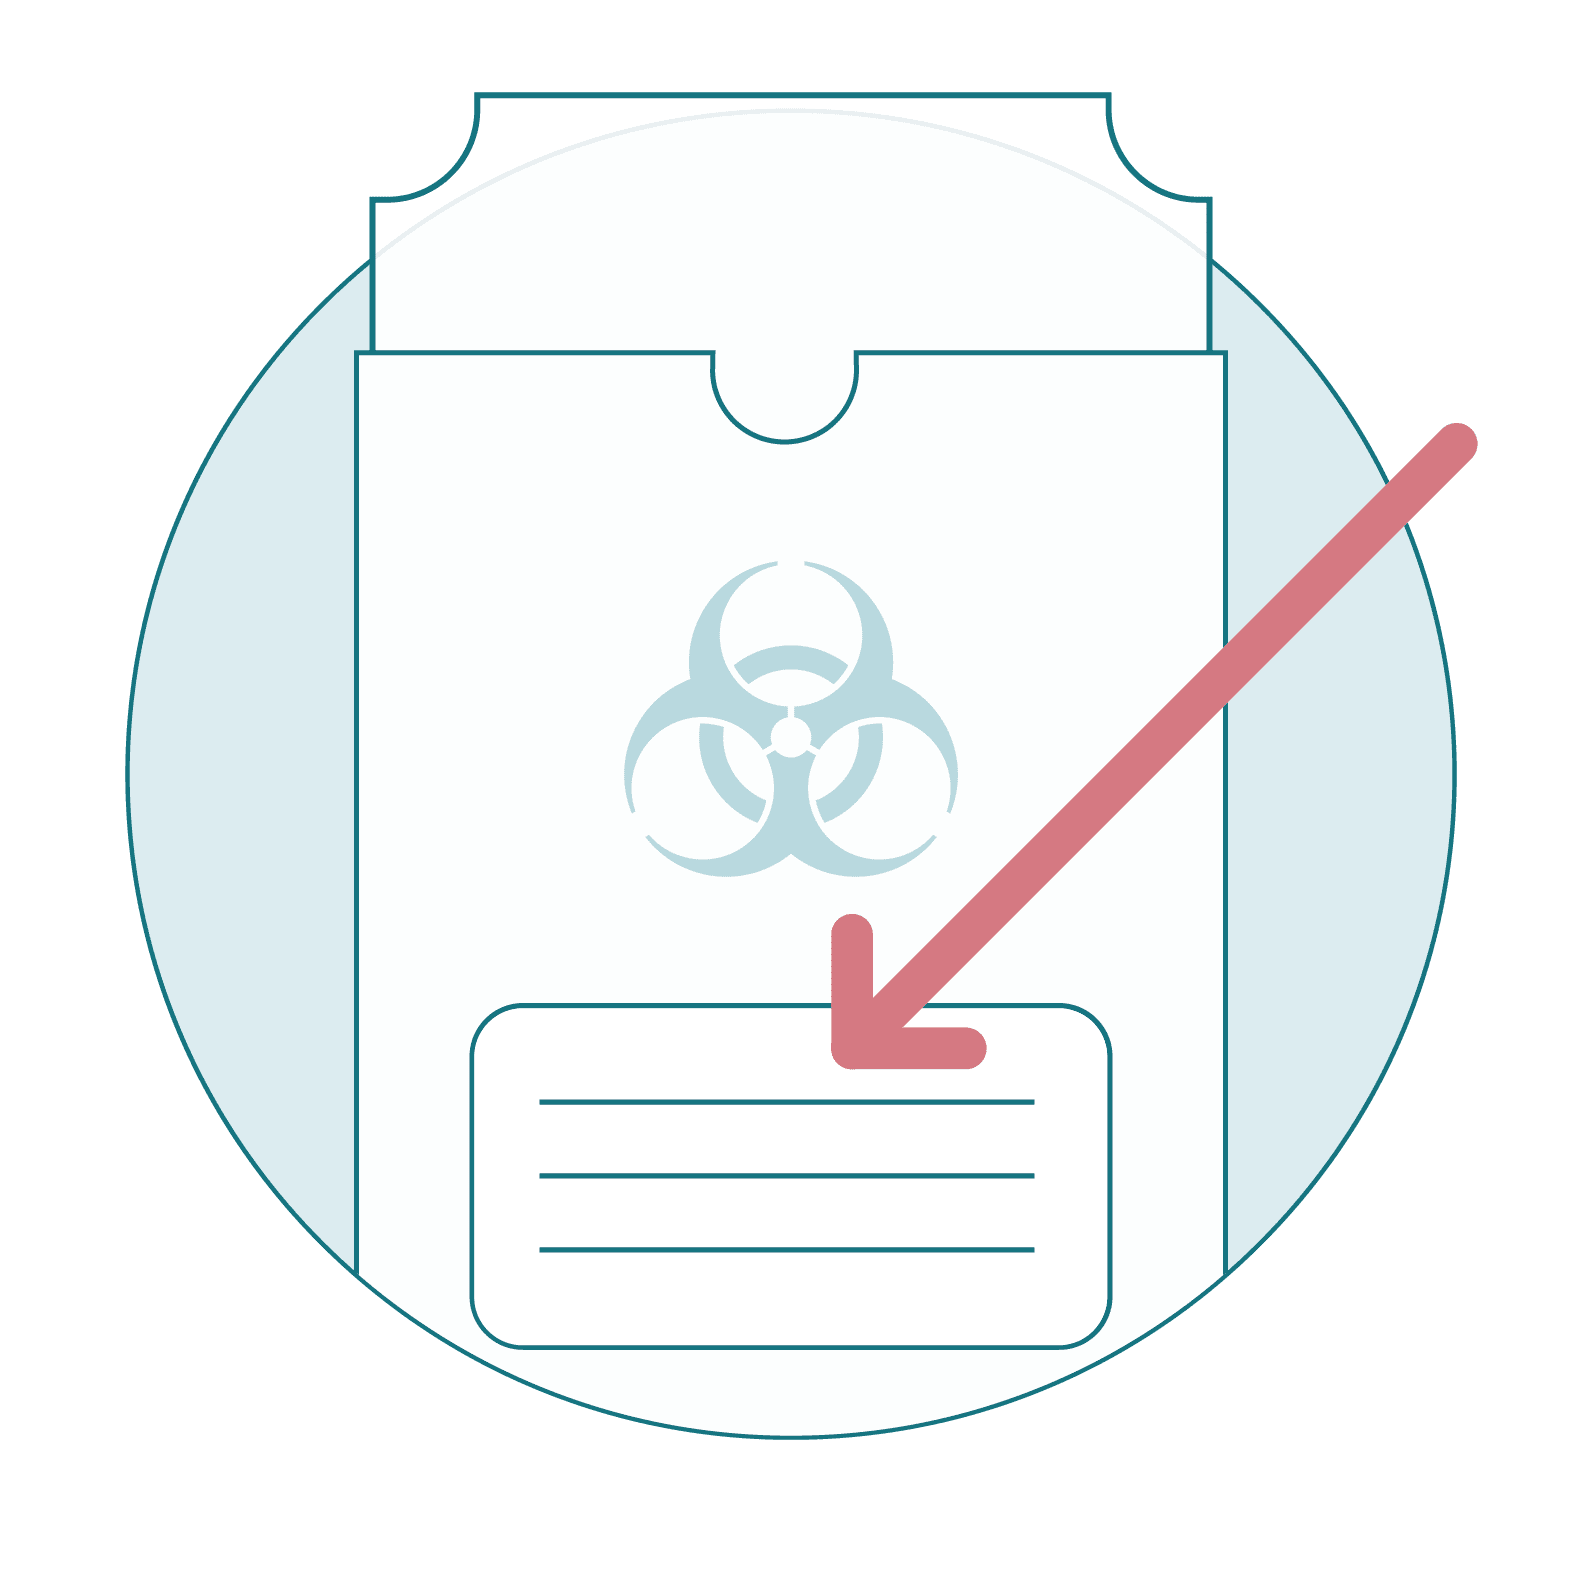
It is important to fill in the label located on the biohazard bag with the date of collection and your date of birth and sex.
This is essential for the laboratory to process your samples.
-
Wash your hands

Wash your hands in warm, soapy water and dry thoroughly.
-
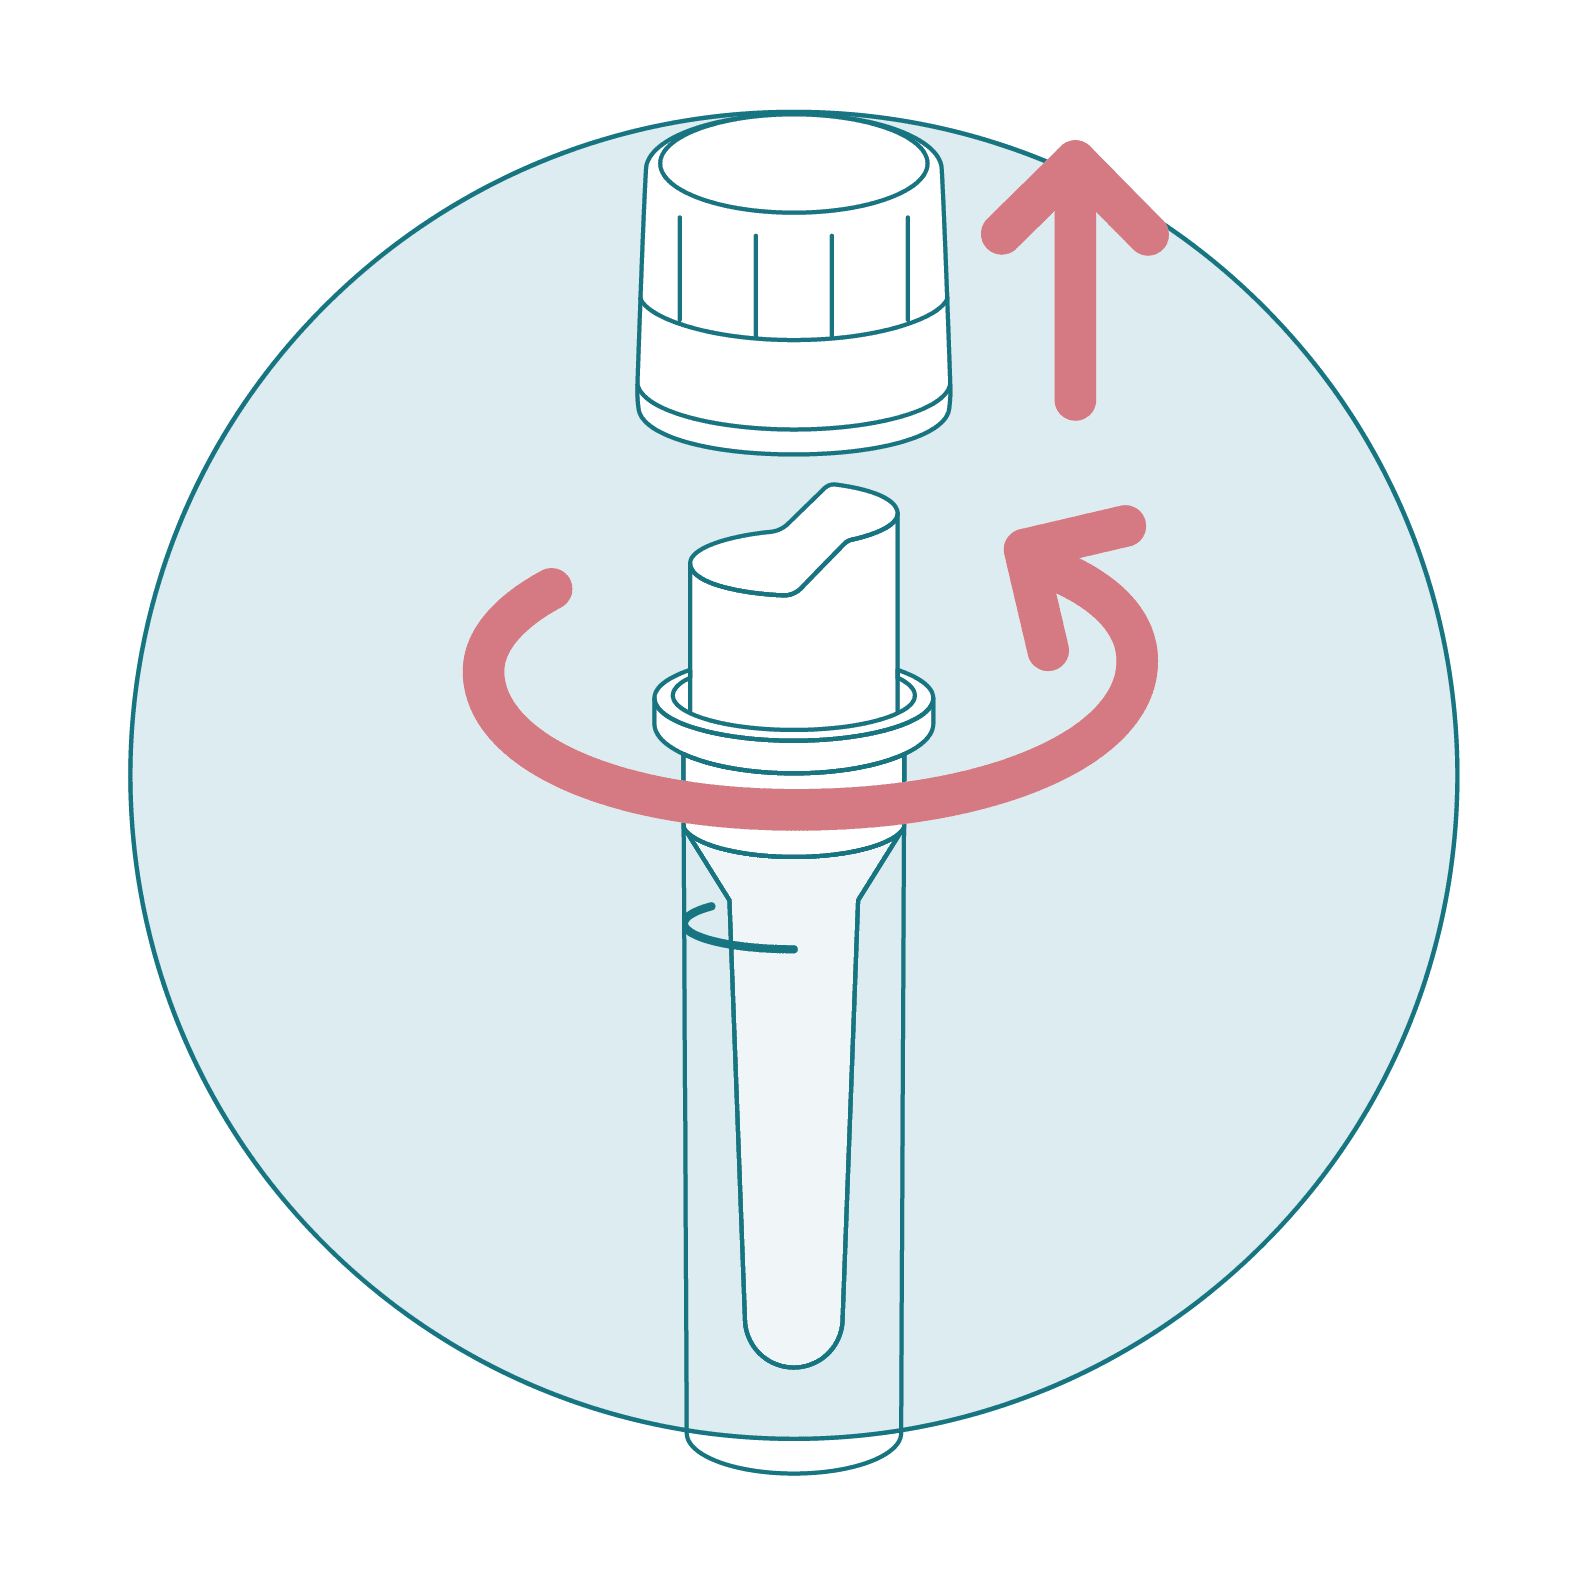
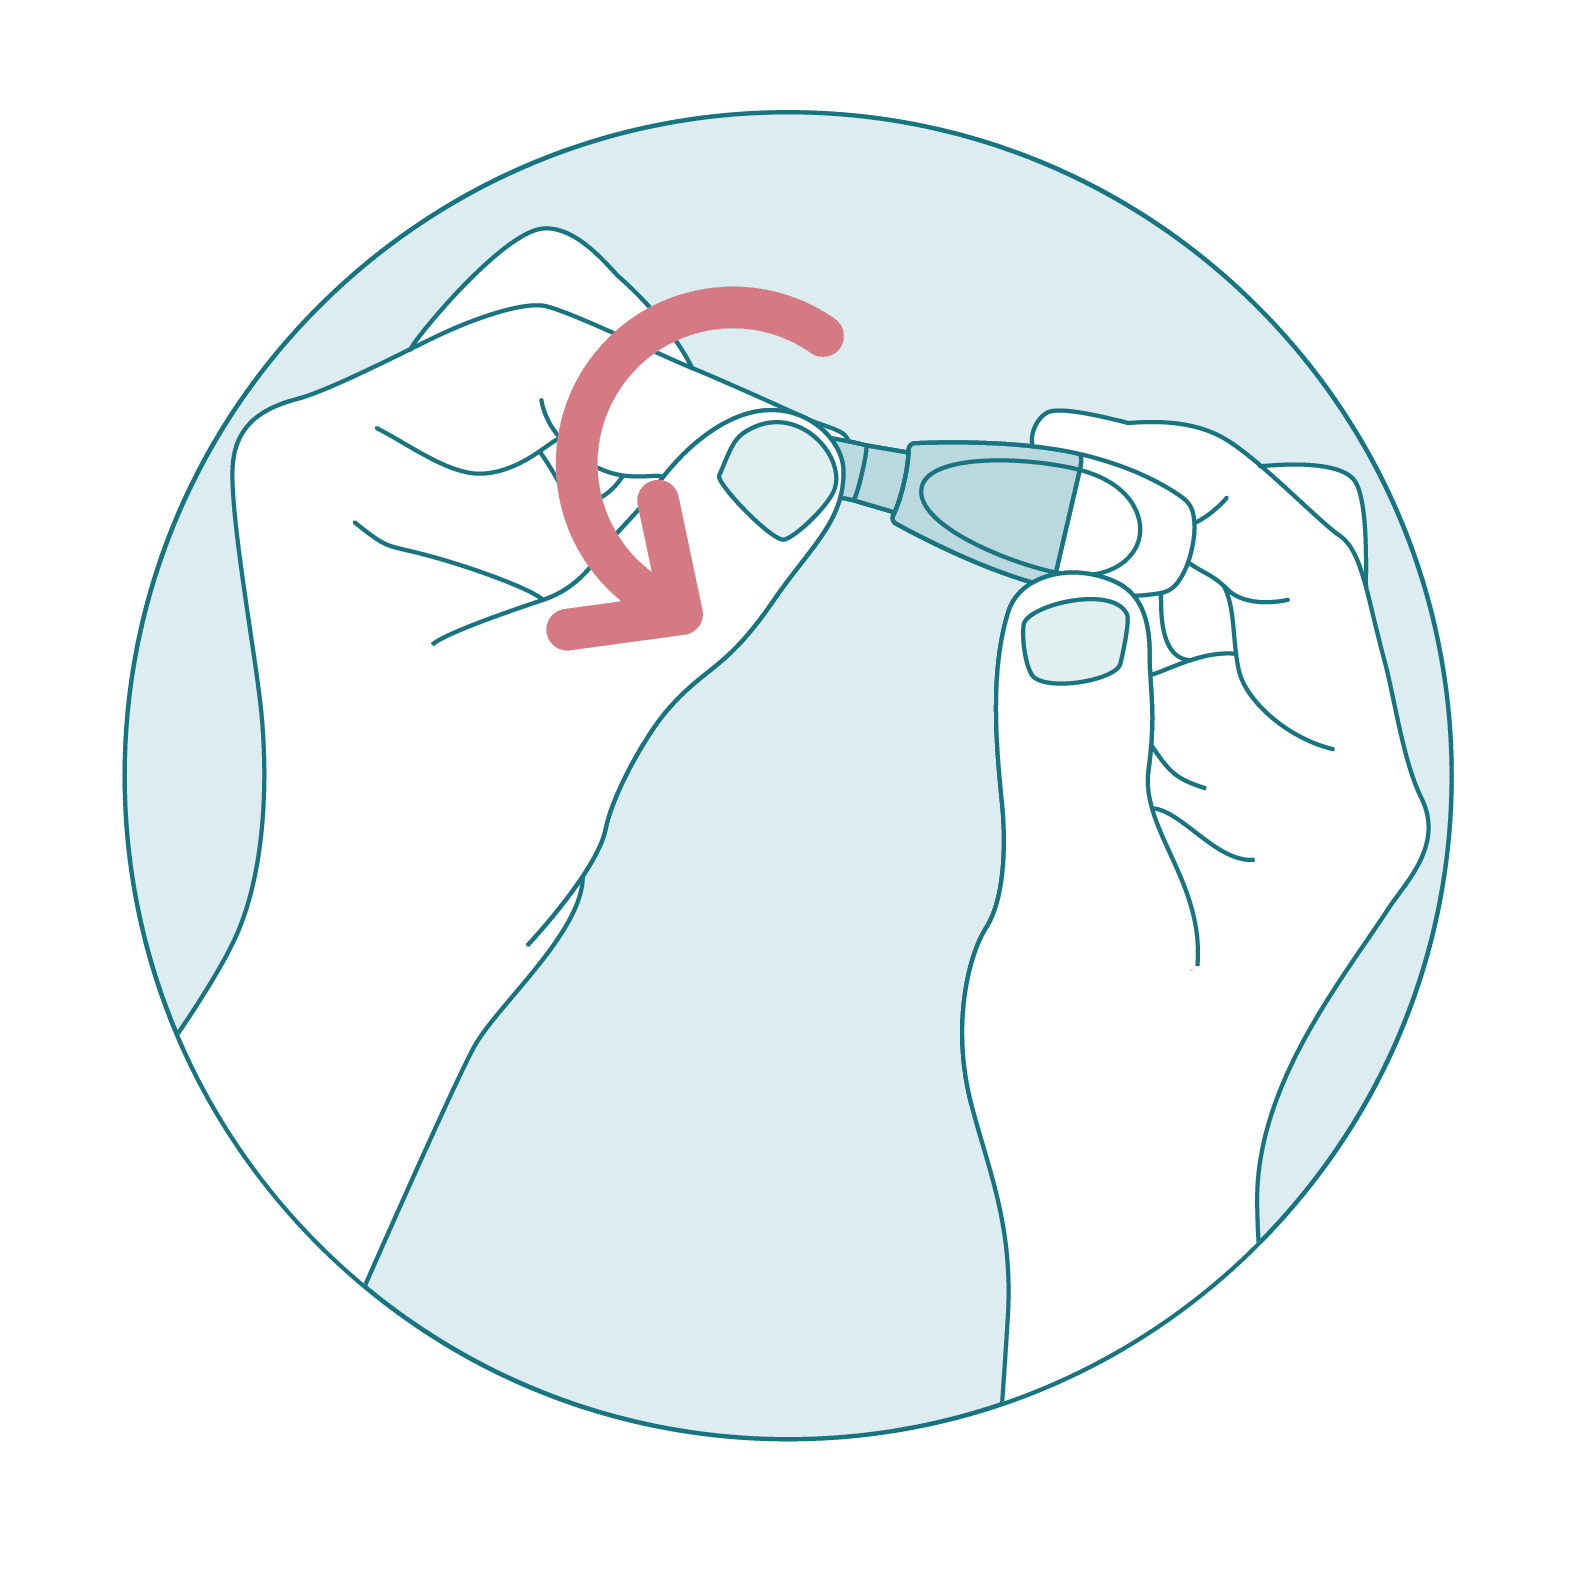
Open the sample tube.
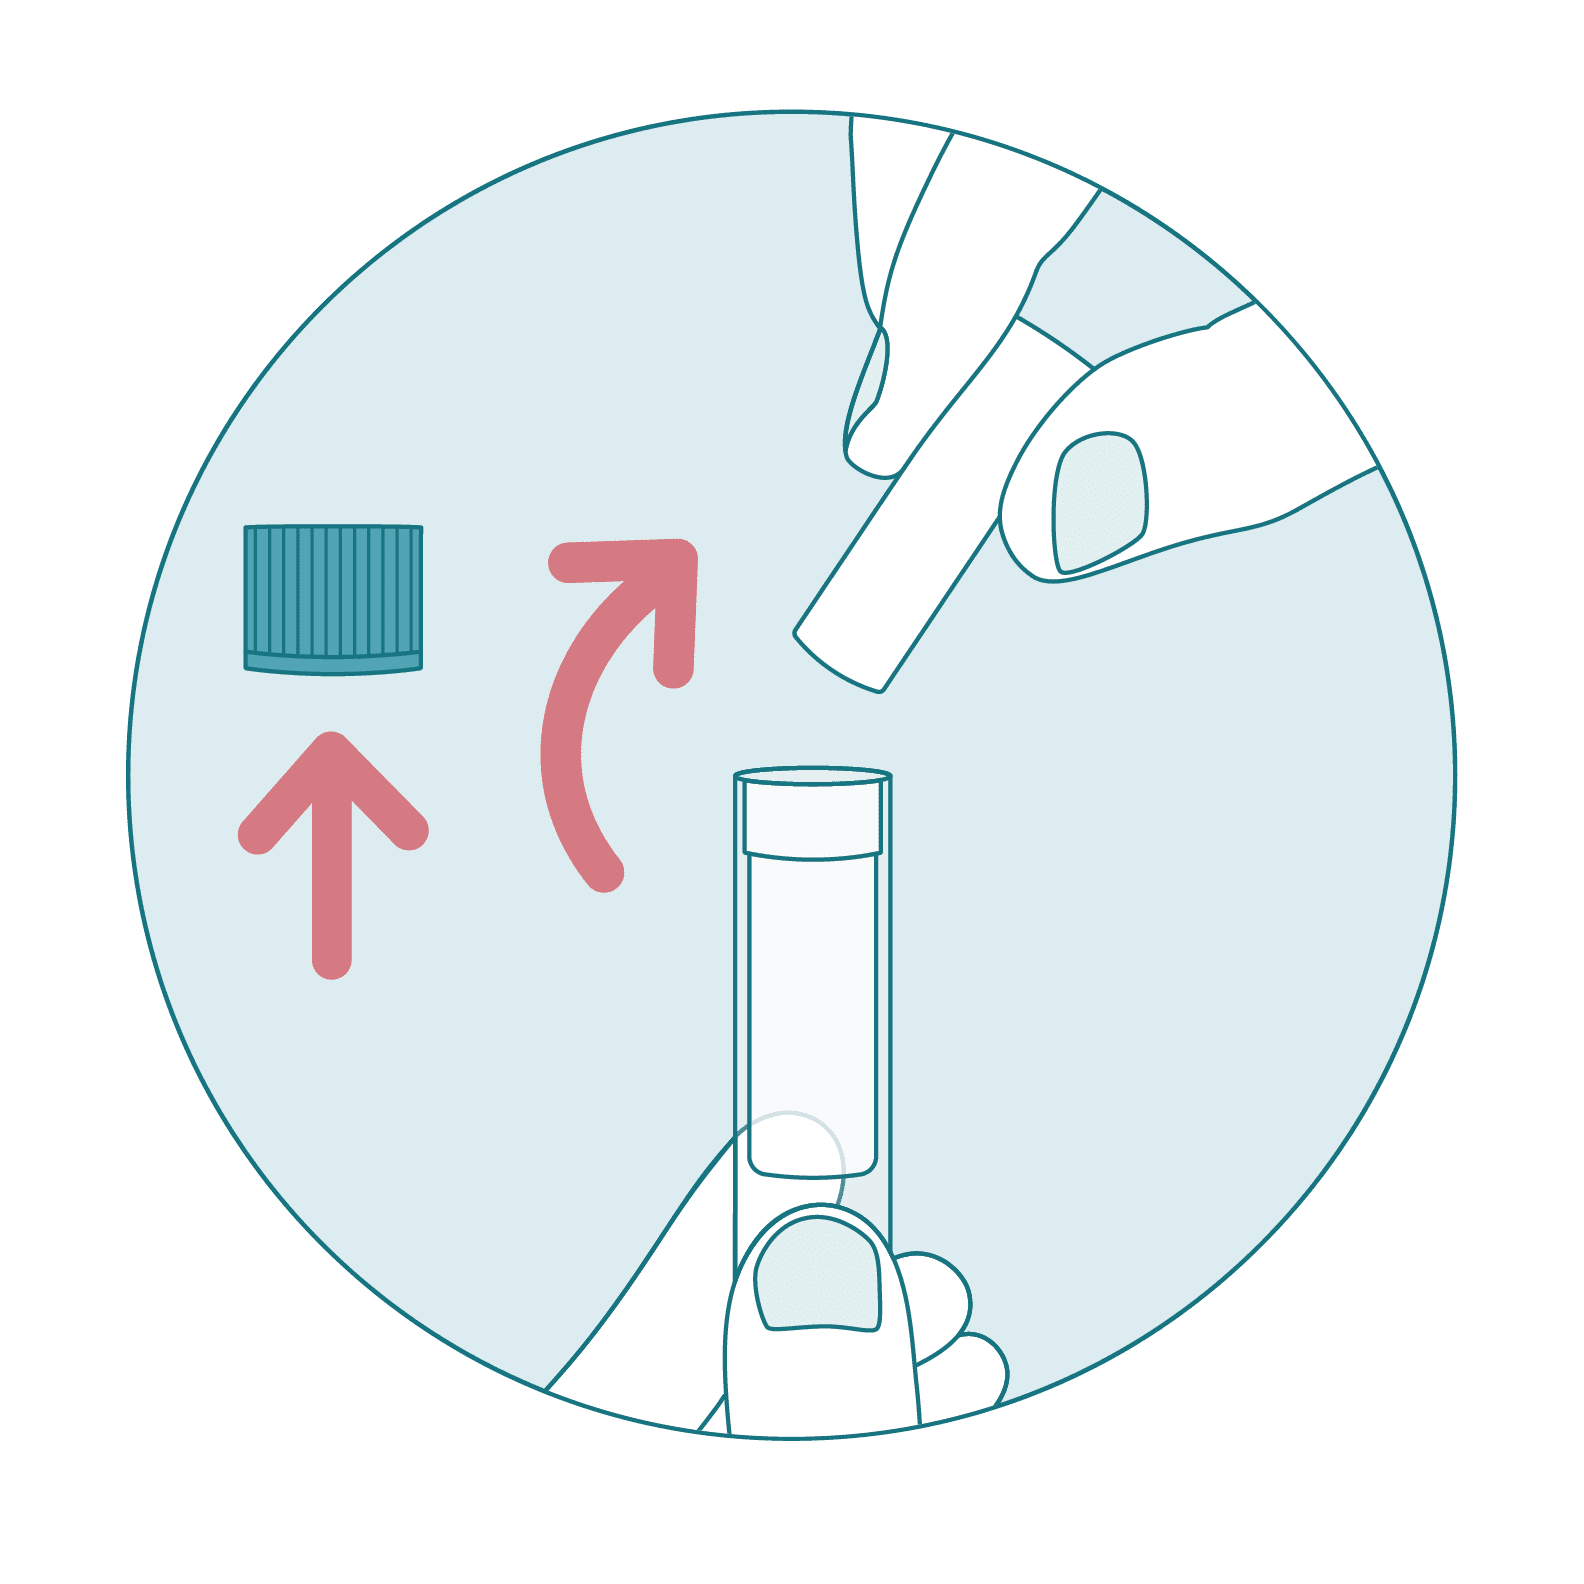
Remove the cap from the sample tube and take out the sponge. If the upper compartment becomes separated from the tube, replace it after the sponge is removed.
-
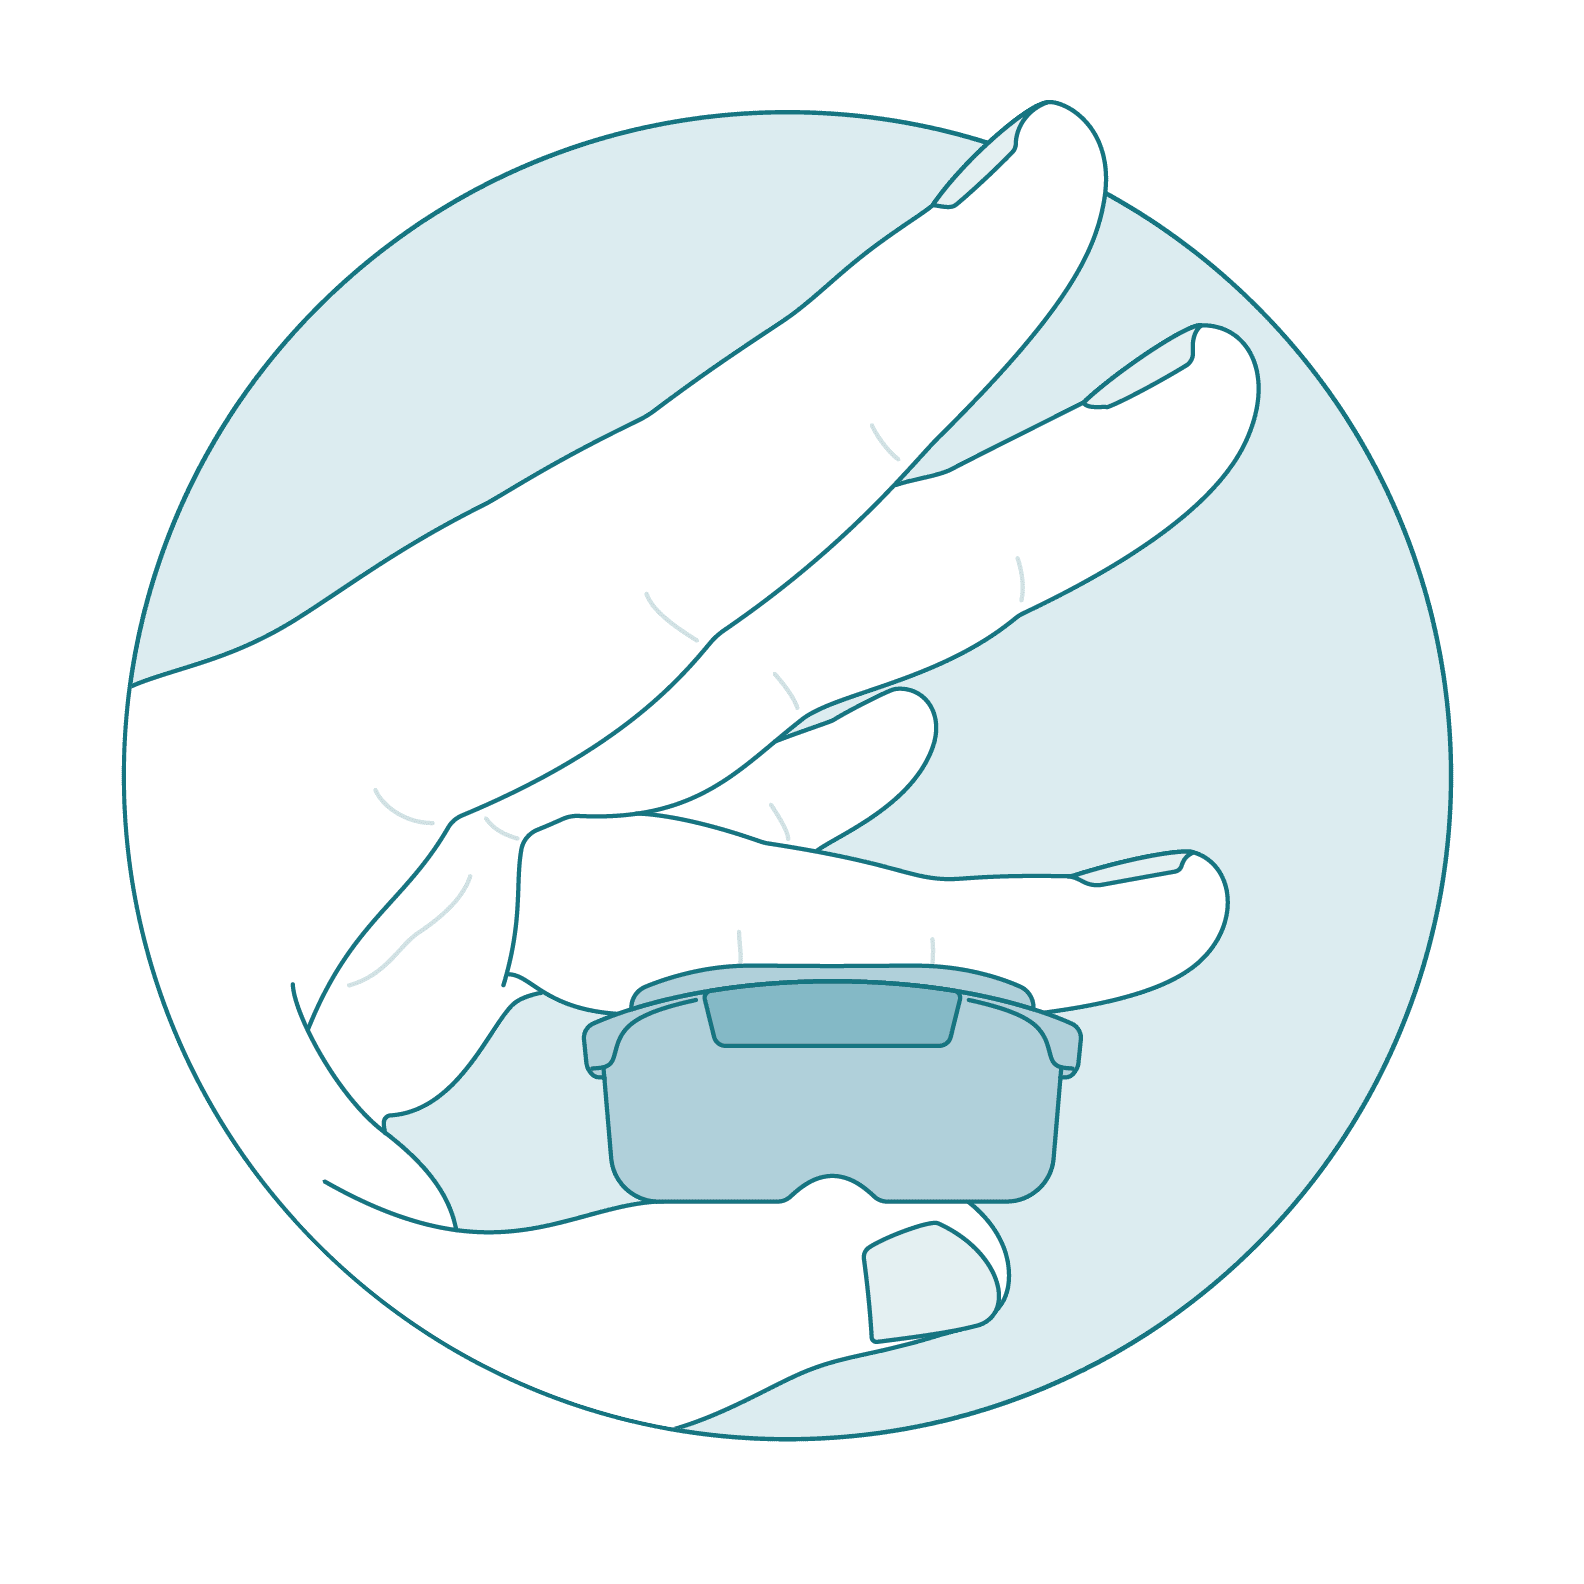
Place the sponge in your mouth without chewing.
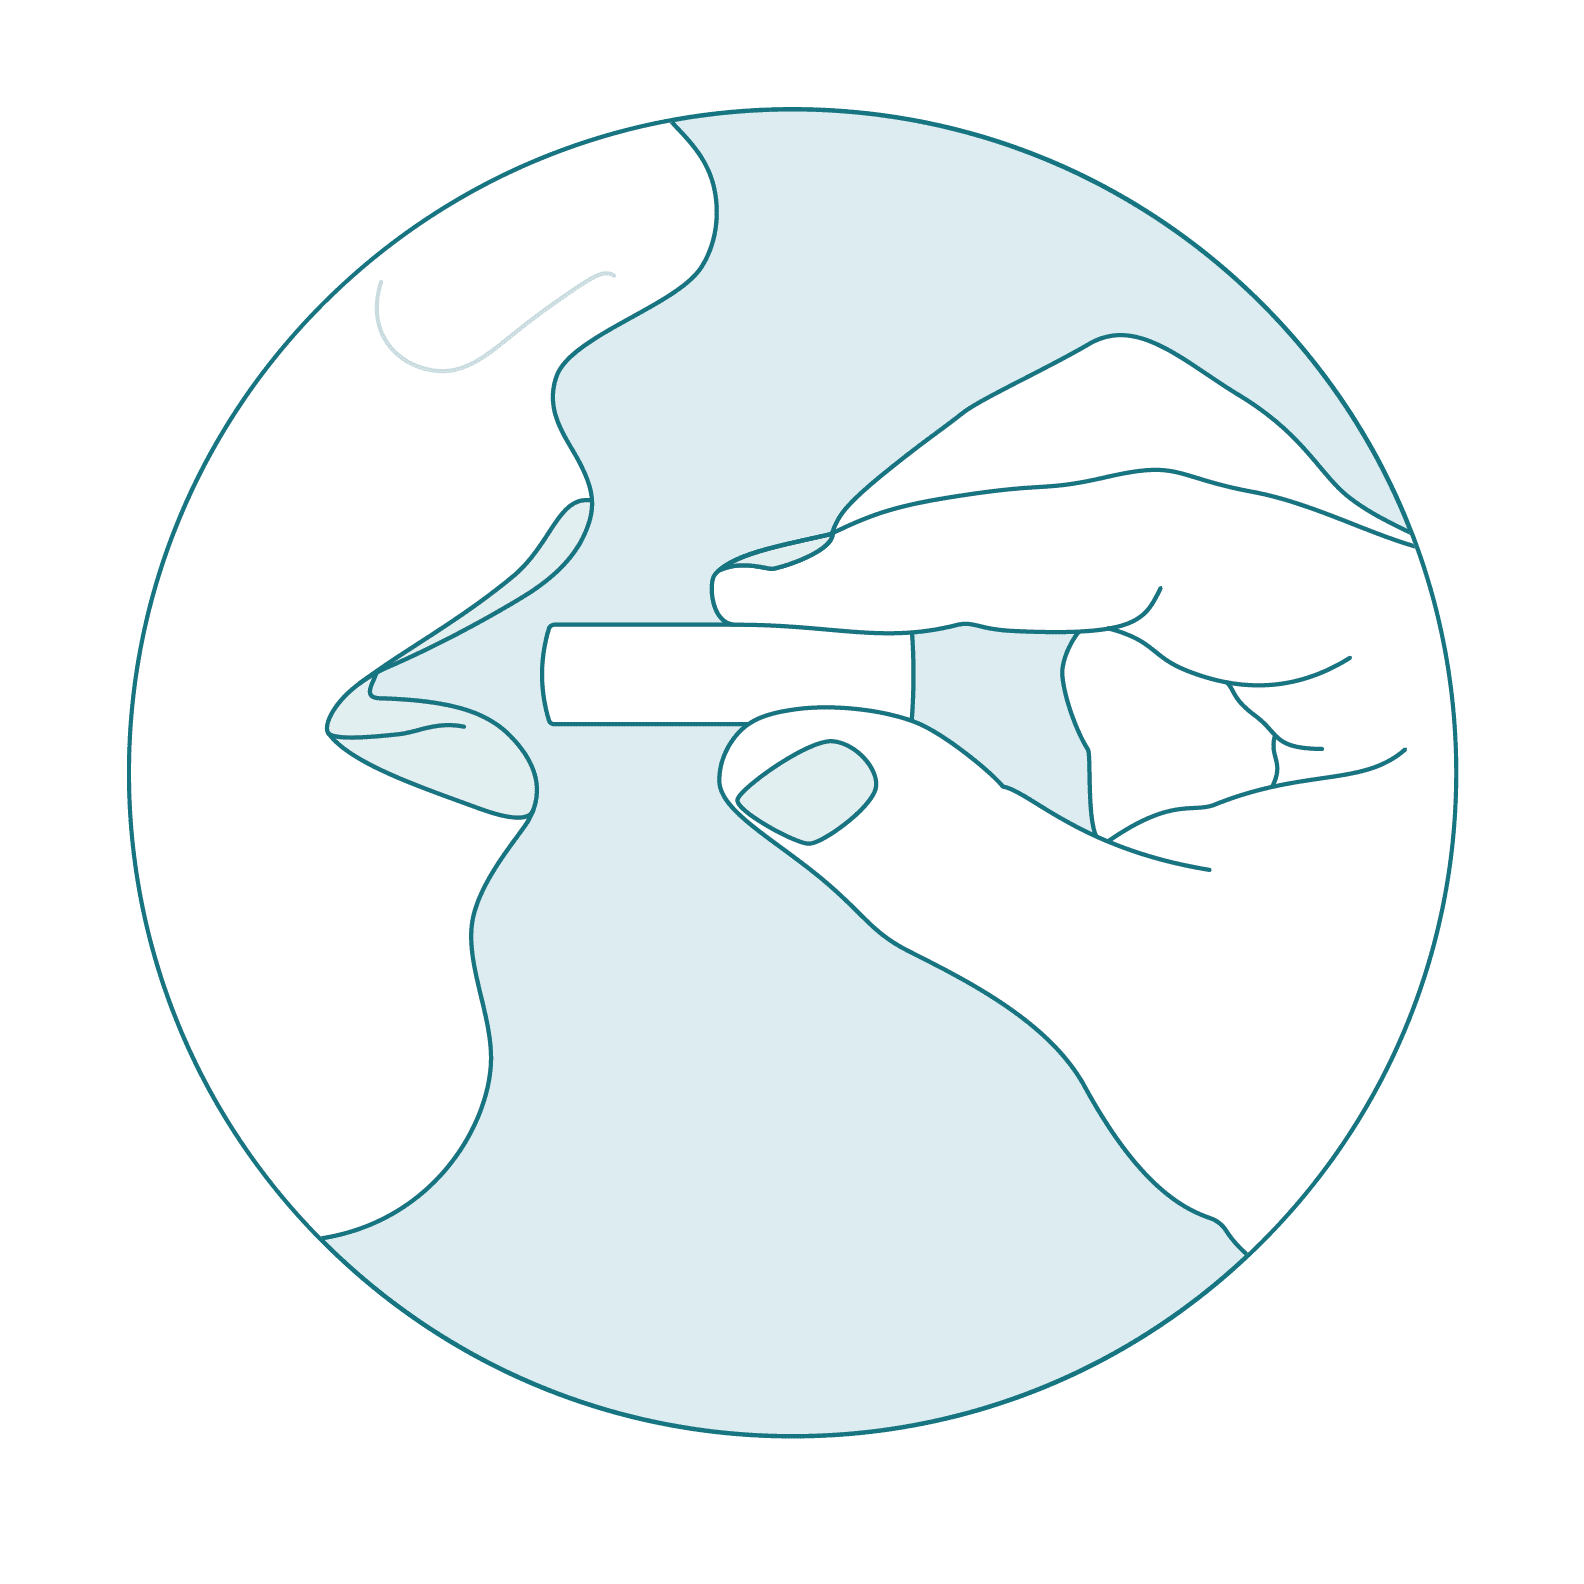
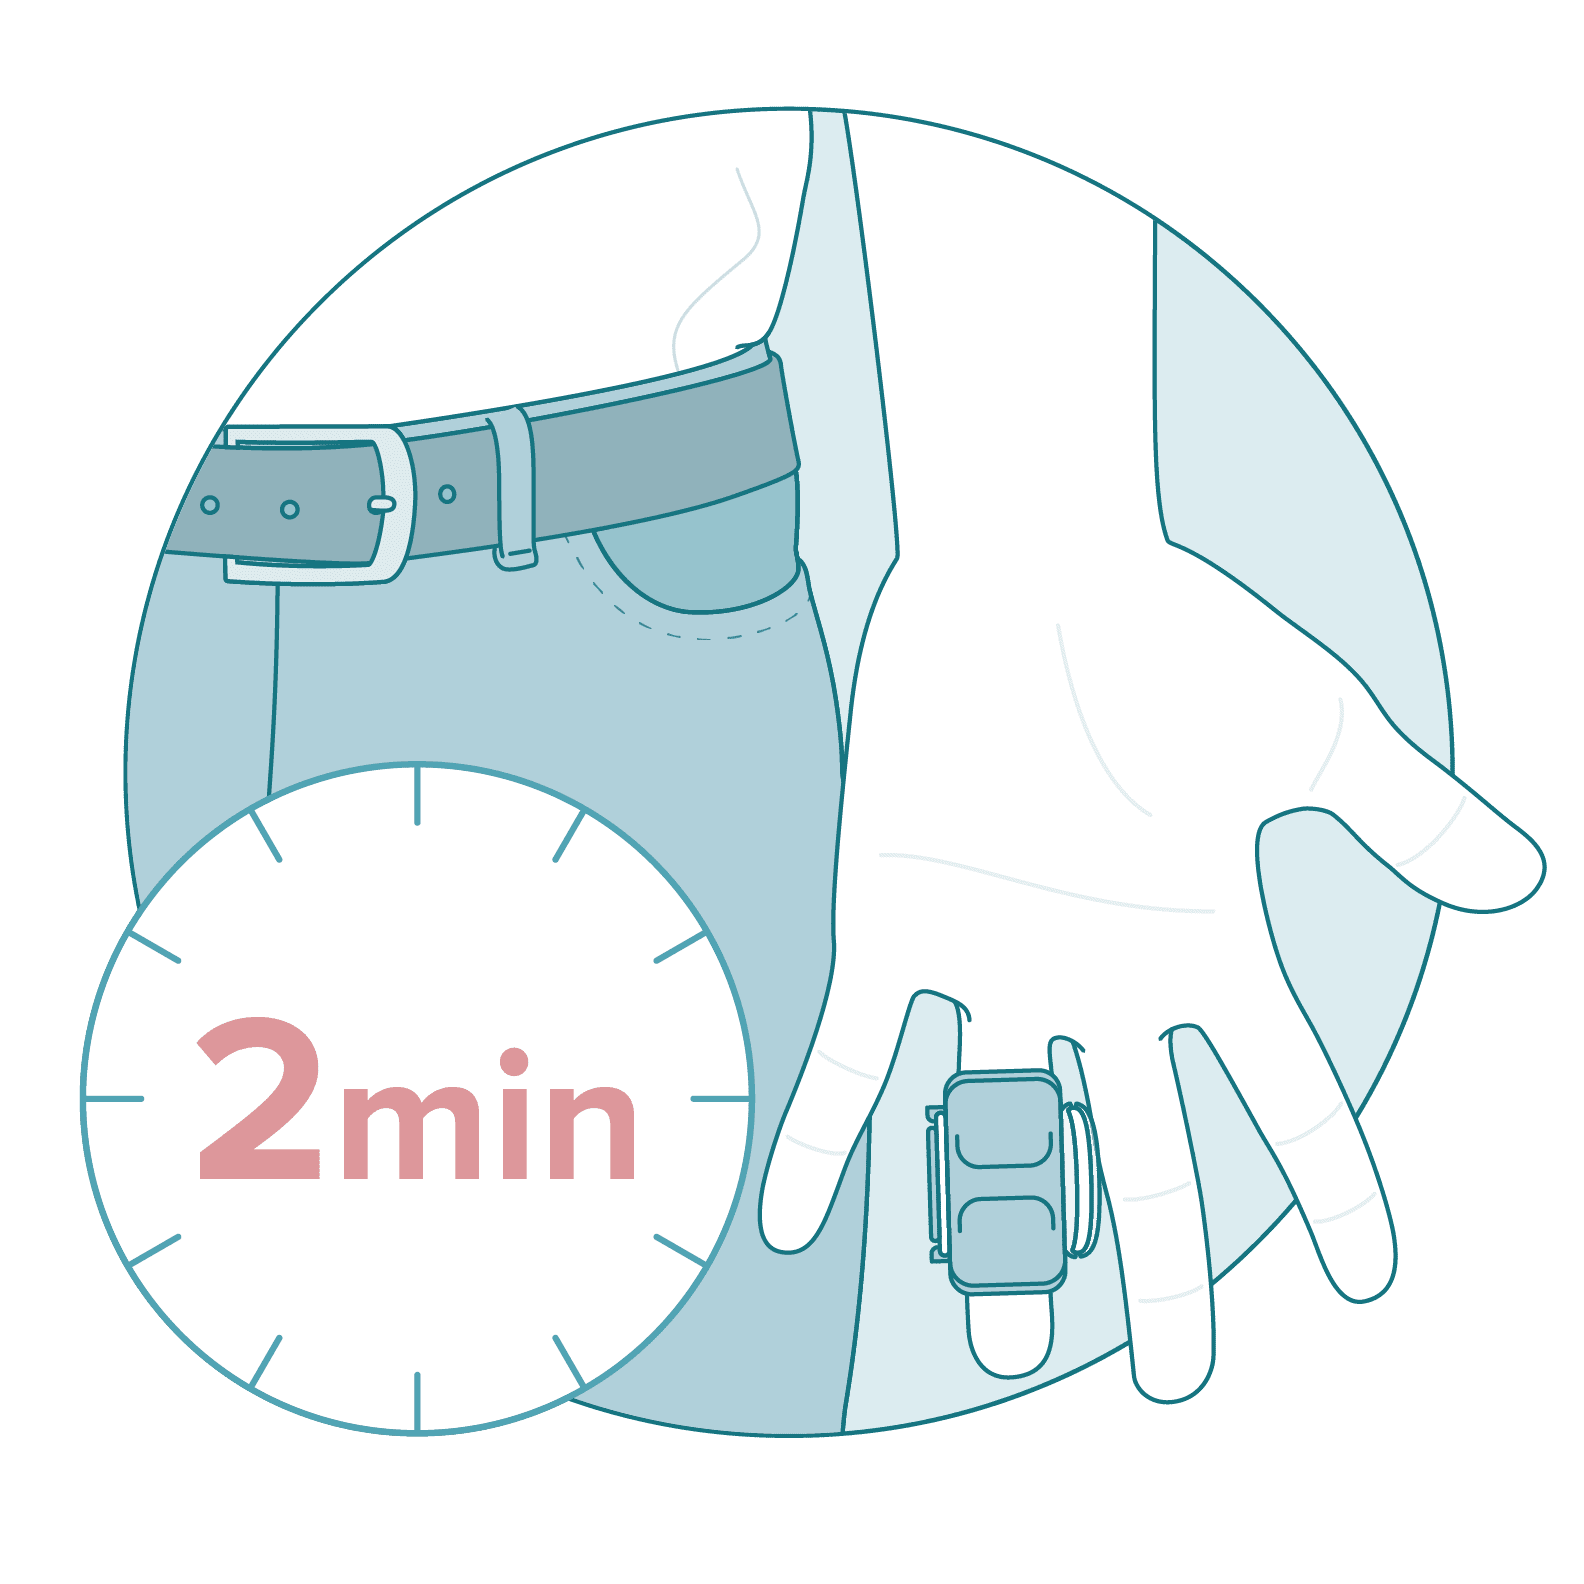
Place the sponge in your mouth between your gums and cheek. Leave it in place for 2 minutes.
Do not chew the sponge.
If an extremely small amount of saliva is produced, leave the swab in your mouth for longer.
-
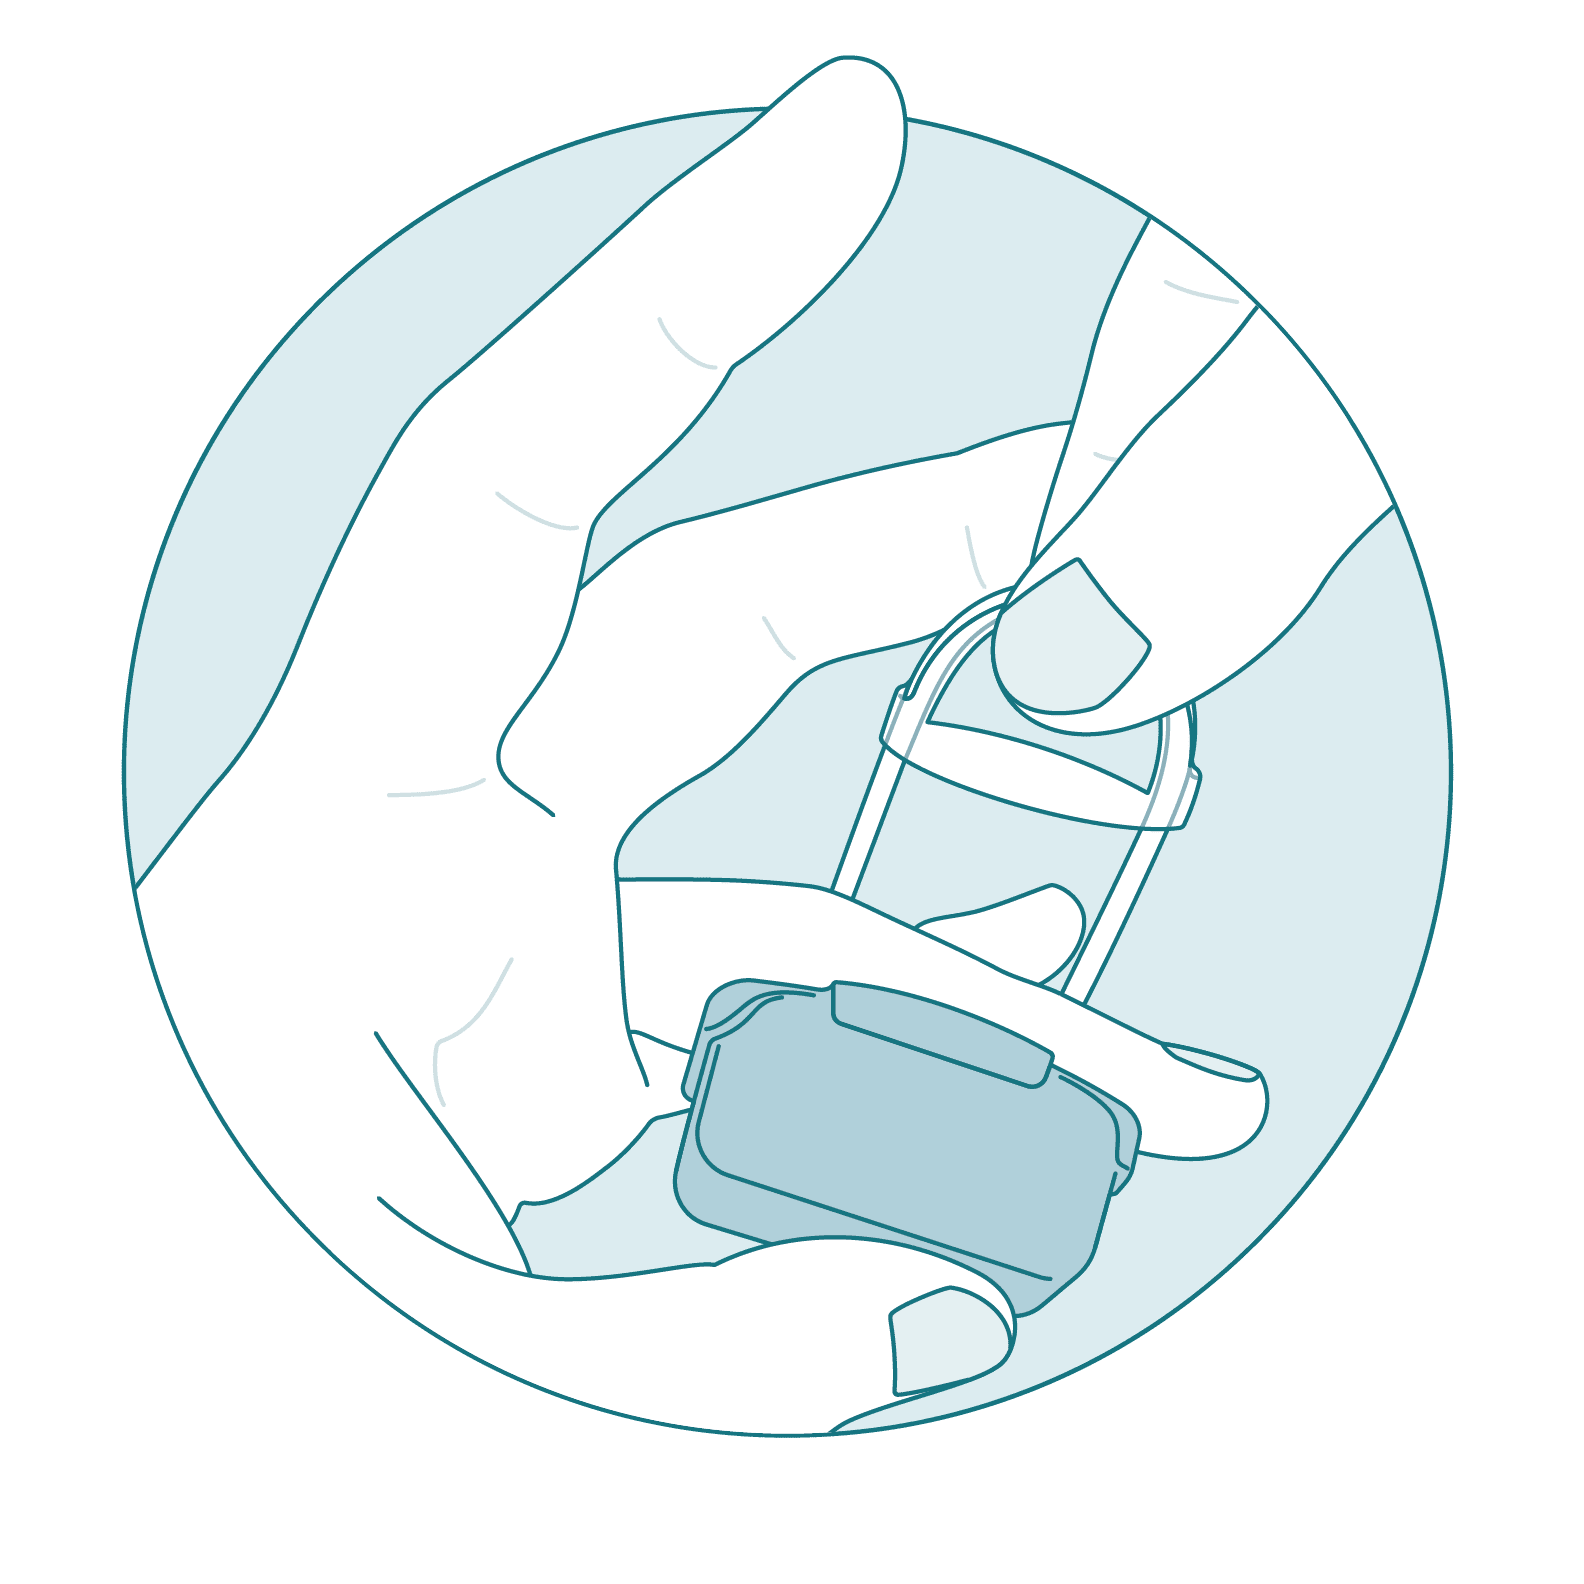
Return the sponge to the sample tube
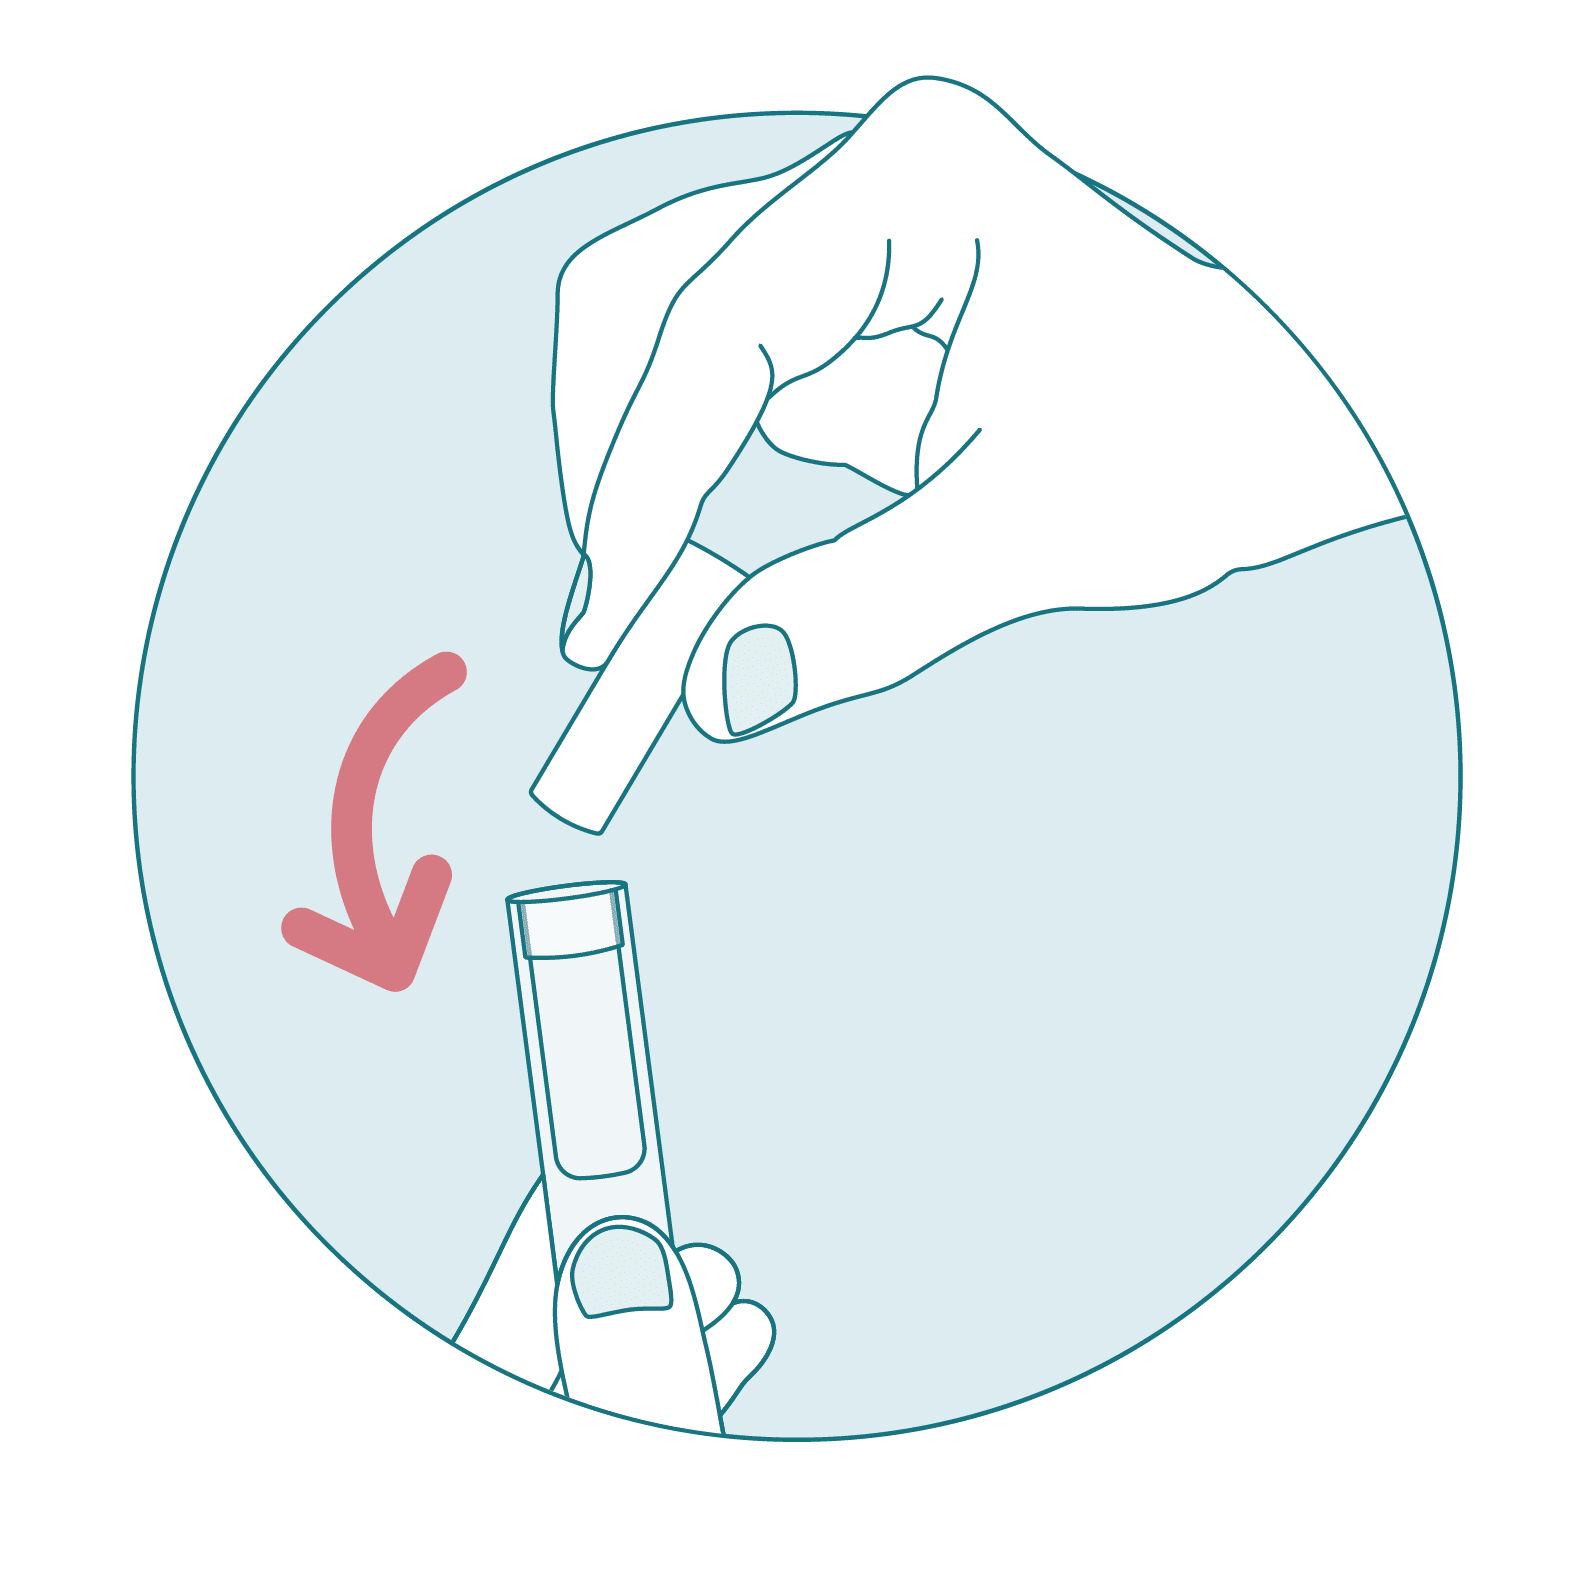
Return the sponge to the upper compartment.
If the sponge is not in the upper compartment of the tube your will be rejected.
Replace the cap and firmly seal the tube. Ensure the upper compartment is placed in the outer sample tube. Replace the cap and firmly seal the tube.
-
Wash your hands
Wash your hands in warm, soapy water and dry thoroughly.
-
Prepare for your blood sample collection
Collecting the sample after a shower or running your hand under warm water is helpful as warm hands will make it easier to collect your sample. Ensure you are well hydrated when collecting the sample. Nails that are too long can make it more difficult to collect a sample.
-
Wash your hands
Wash your hands in warm, soapy water and dry thoroughly.
-
Prepare to collect your sample
Remove the contents from the kit box and place them in front of you. Take the Phlebotic Assistant, unhook the pull tab, then remove and dispose of the red cap.
-
Open the blood collection tube
Twist the cap to open the blood collection tube and place it where it will be easy to collect your sample.
-
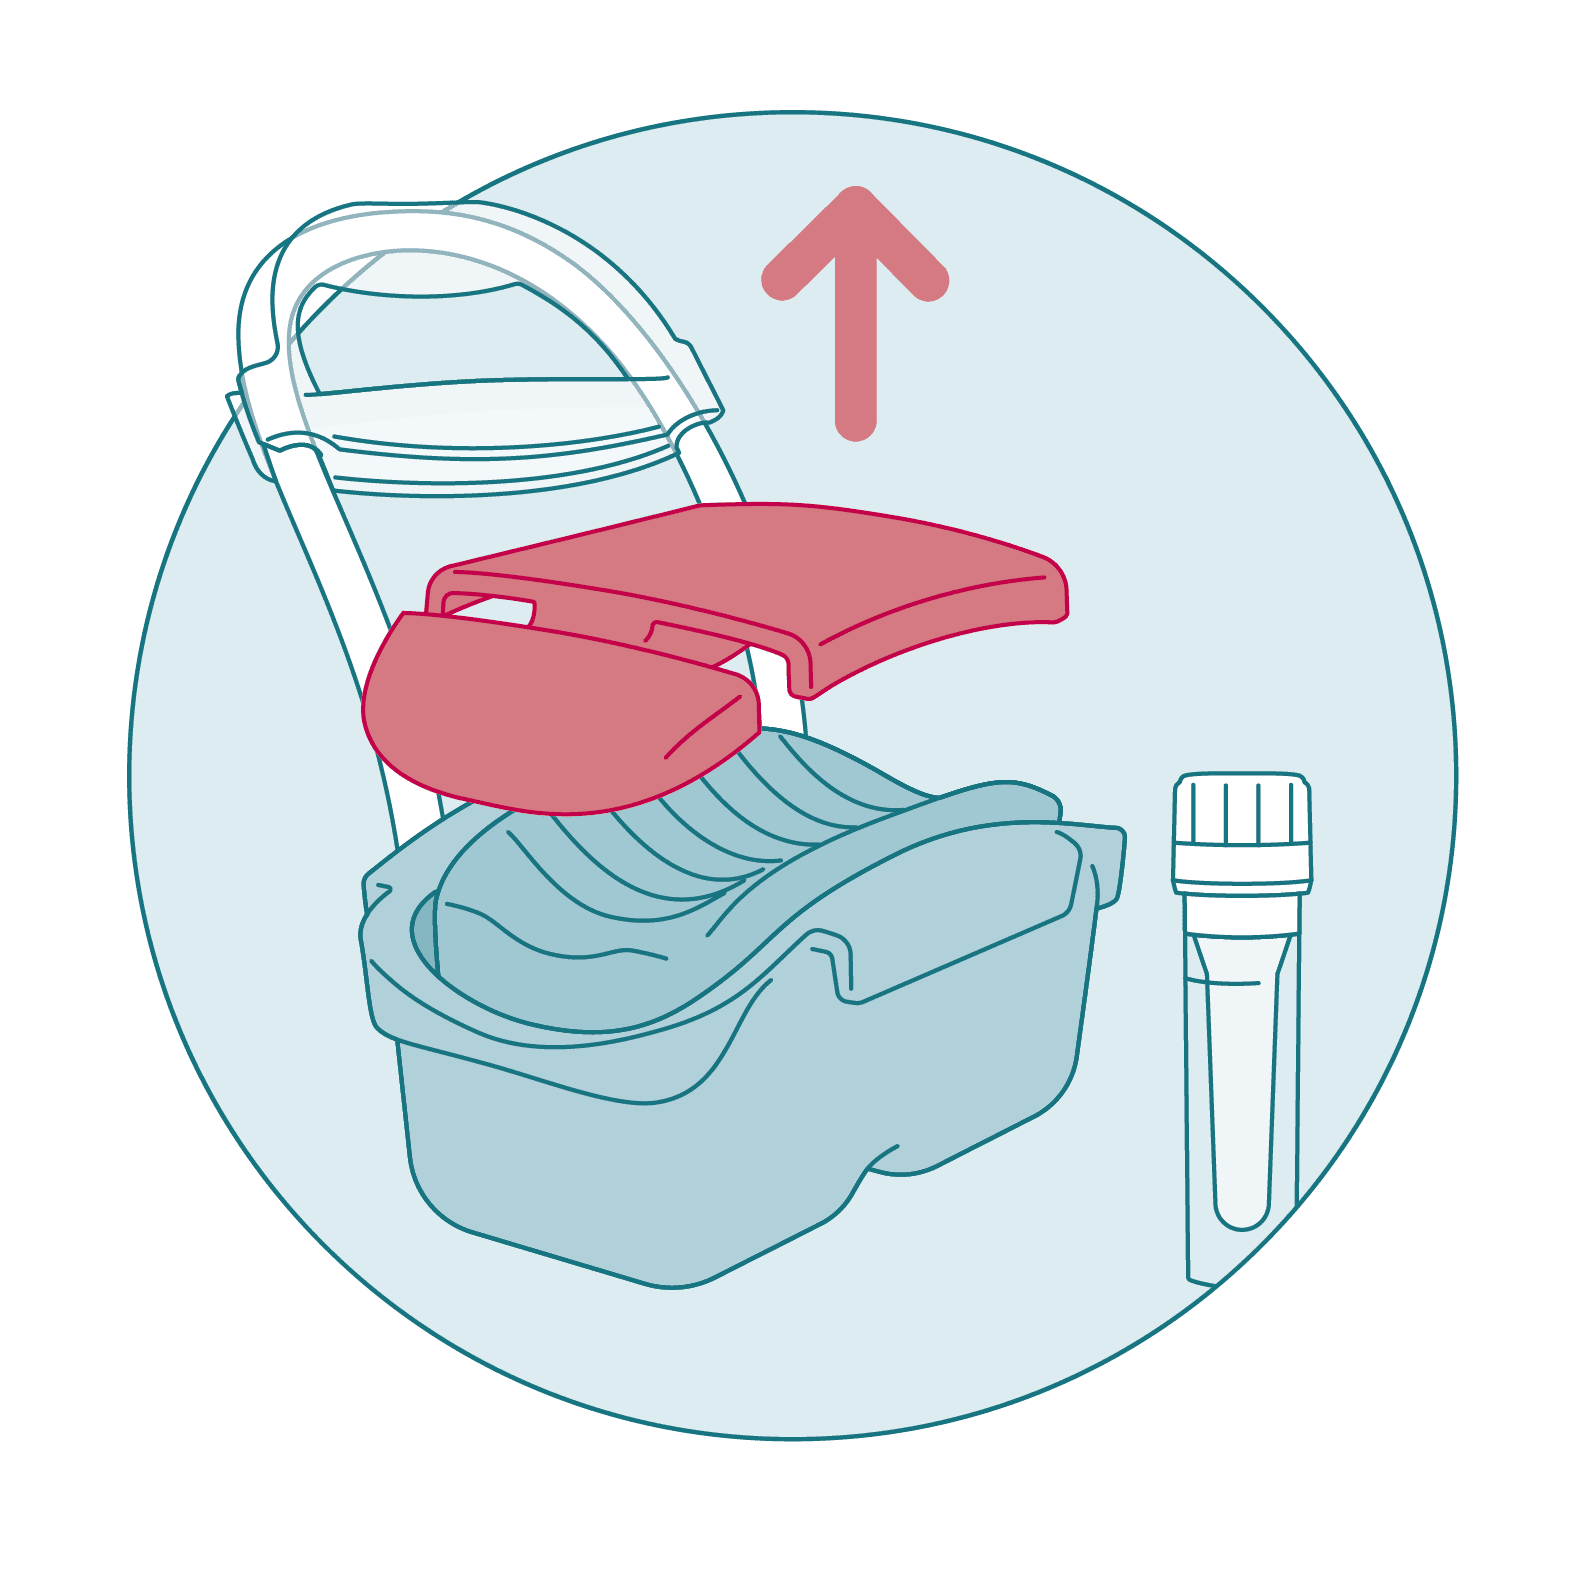
Put on the Phlebotic Assistant

The best finger to use is the 4th (ring) finger on your non-dominant hand. Remove all watches and rings. If you cannot remove your rings, use your middle finger or opposite hand.Do not pierce or collect blood from the smallest (baby/pinky) finger, or any other body part not indicated in the instructions.Note: Hard skin and calluses on your fingertips may limit your ability to collect a blood sample, visit help.letsgetchecked.com for helpful tips.
Place your finger in the vibrating plate and support it with your thumb.
Secure the device by lifting the pull tab up and over your finger and sliding it into place under the clip on the opposite side.
The straps should sit just behind your two knuckles.
Place your hand down by your side for at least 2 minutes. The device should vibrate immediately when it is put on and should remain vibrating until the end of the sample collection. If the device stops vibrating, press and hold the device with your thumb.
-
Prepare the lancet
Please ensure you are seated when collecting your sample.
Take a lancet and twist and remove the thin tab. The lancet is now ready to use. Clean your finger with the alcohol swab provided and allow your finger to dry.
-
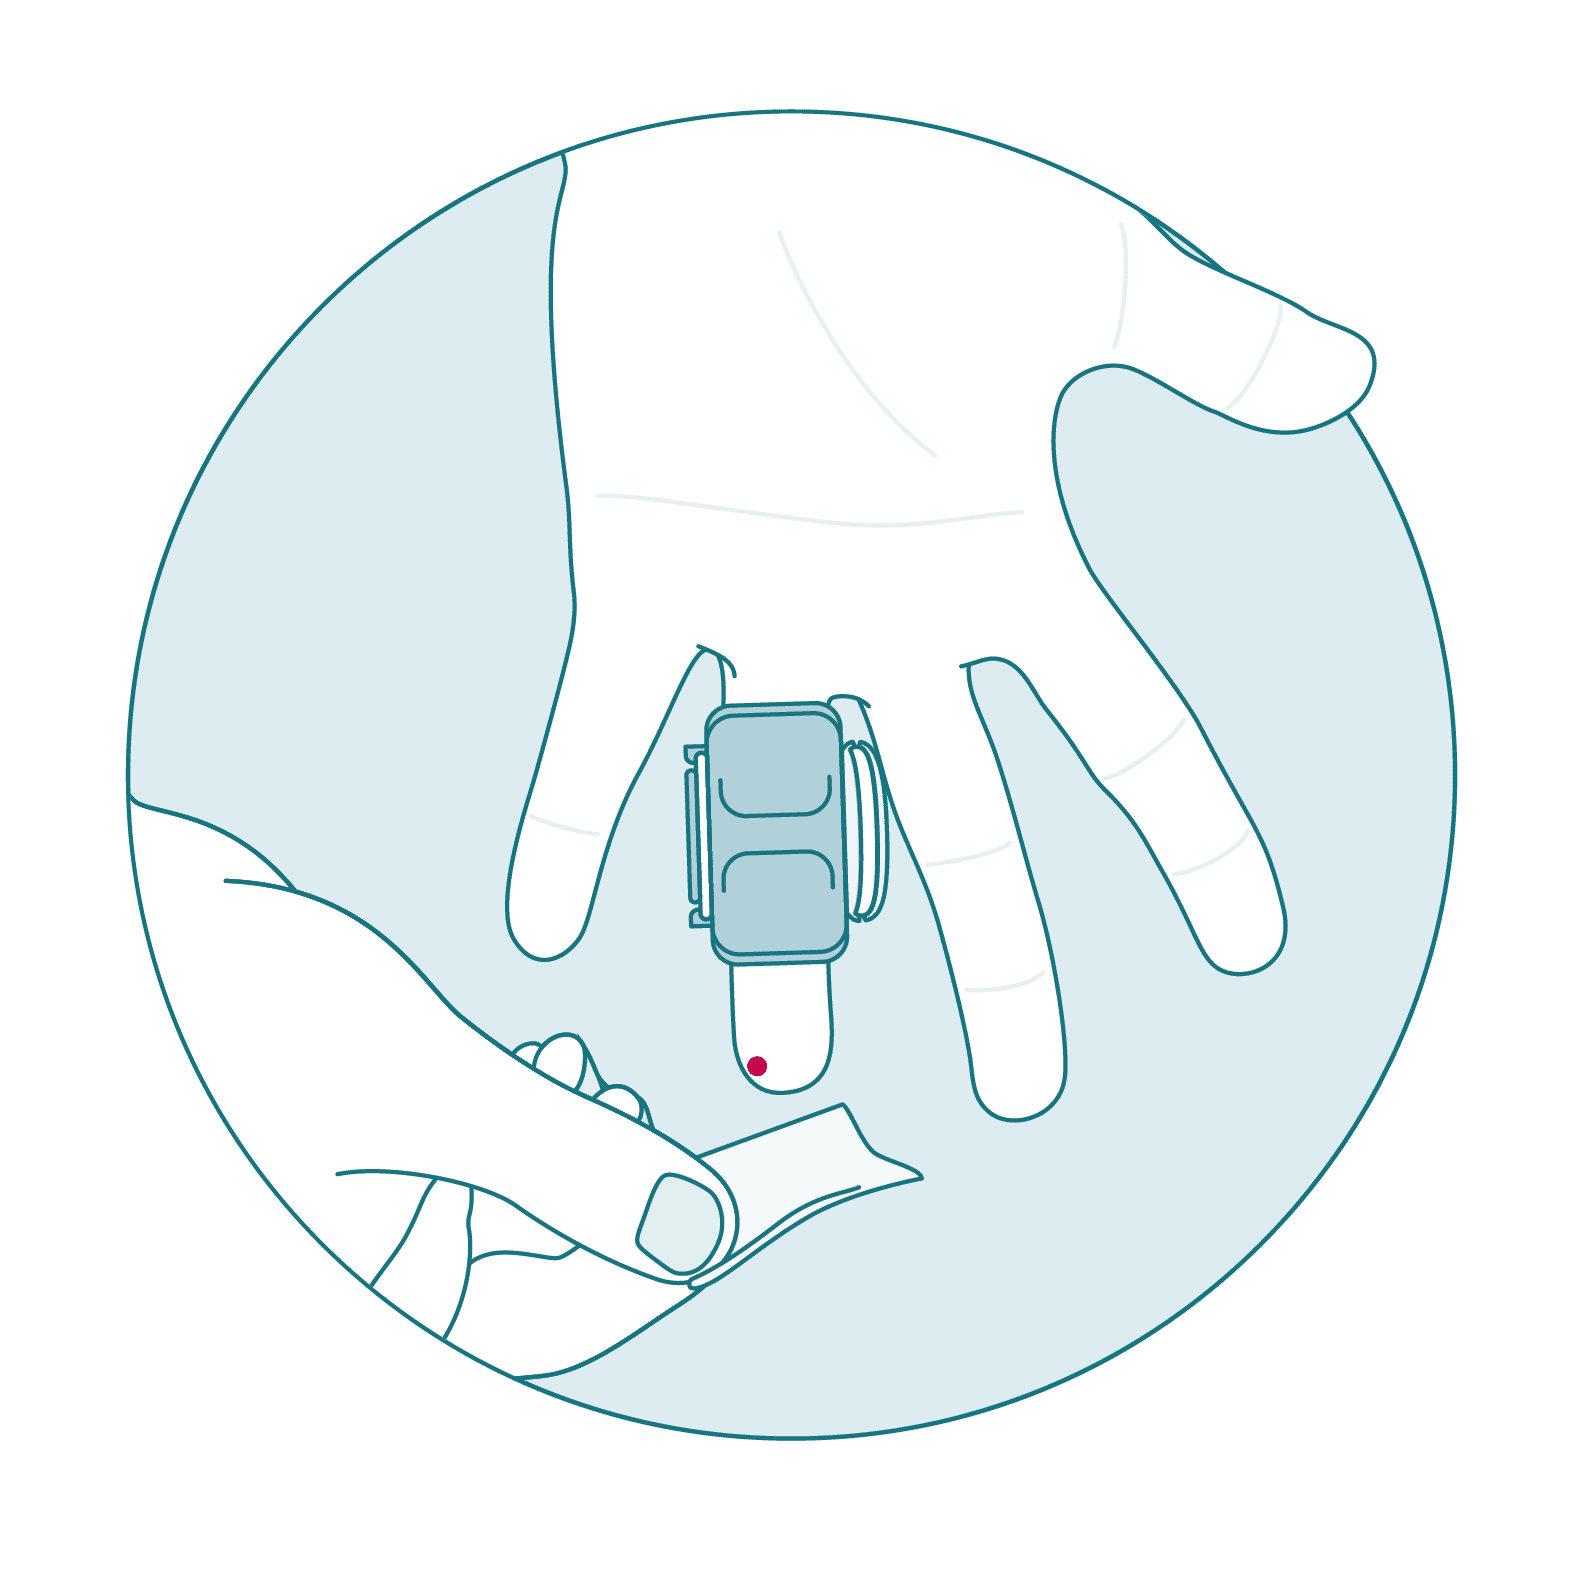
Position the lancet on your fingertip and press down firmly

Position the lancet to one side of the fingertip. Press down firmly until you hear a click.
-
Wipe away the first drop of blood
After piercing the skin, a small drop of blood will form. Wipe away the first drop of blood with the gauze provided. Ensure your hand and arm are angled downwards.
-
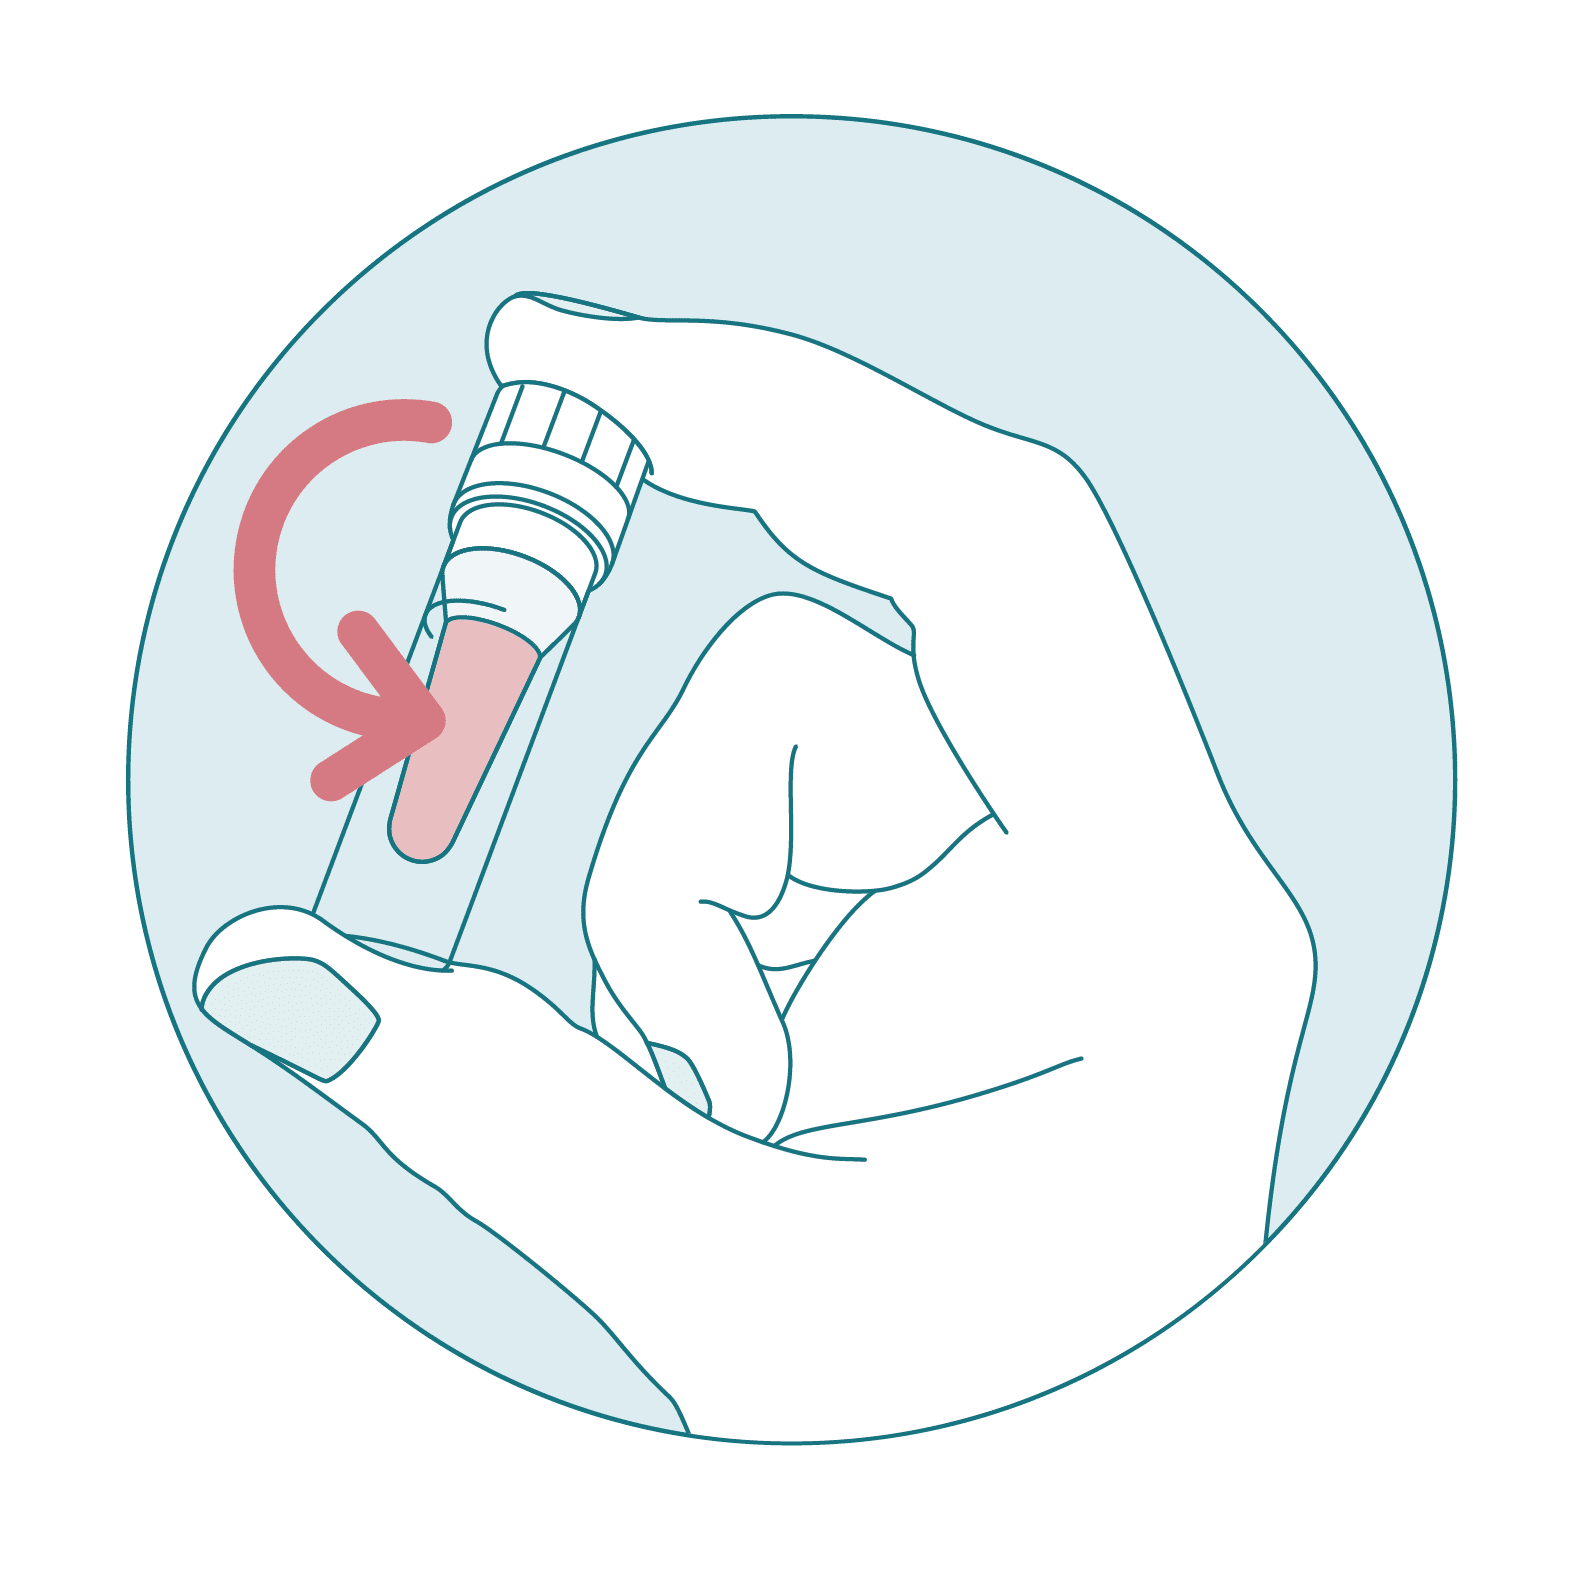
Collect the sample in the blood collection tube
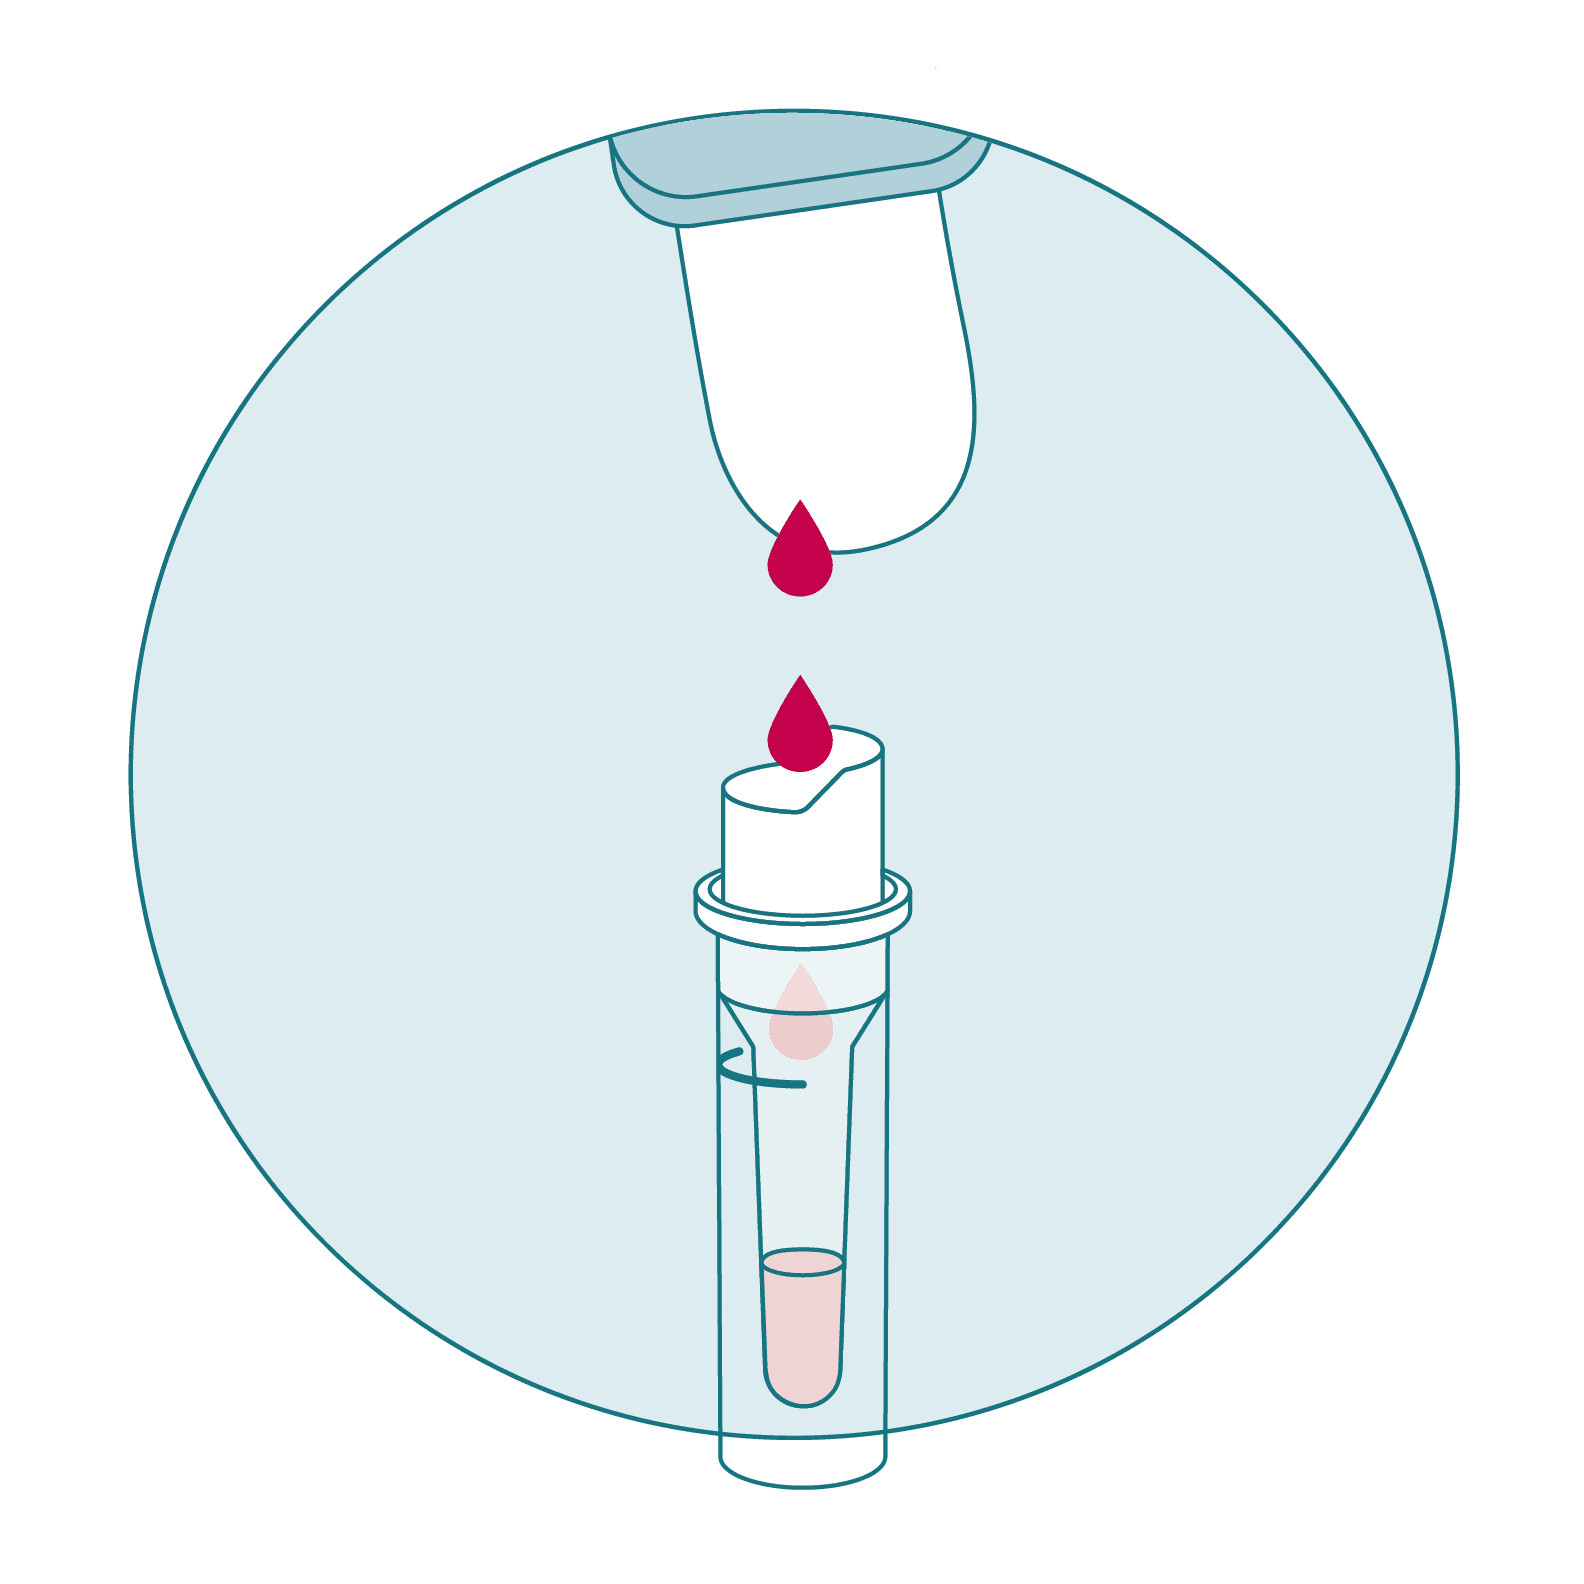
Lightly tap the droplets of blood against the inside of the blood collection tube. It must be filled to the top line marked on the side of the tube. Do not squeeze your fingertip whilst collecting your sample.
An under-filled blood collection tube will not be accepted by the laboratory.
Note: If the blood flow stops, you will need to use the same finger on your opposite hand, or your middle finger.
-
Remove the device and firmly seal the blood collection tube
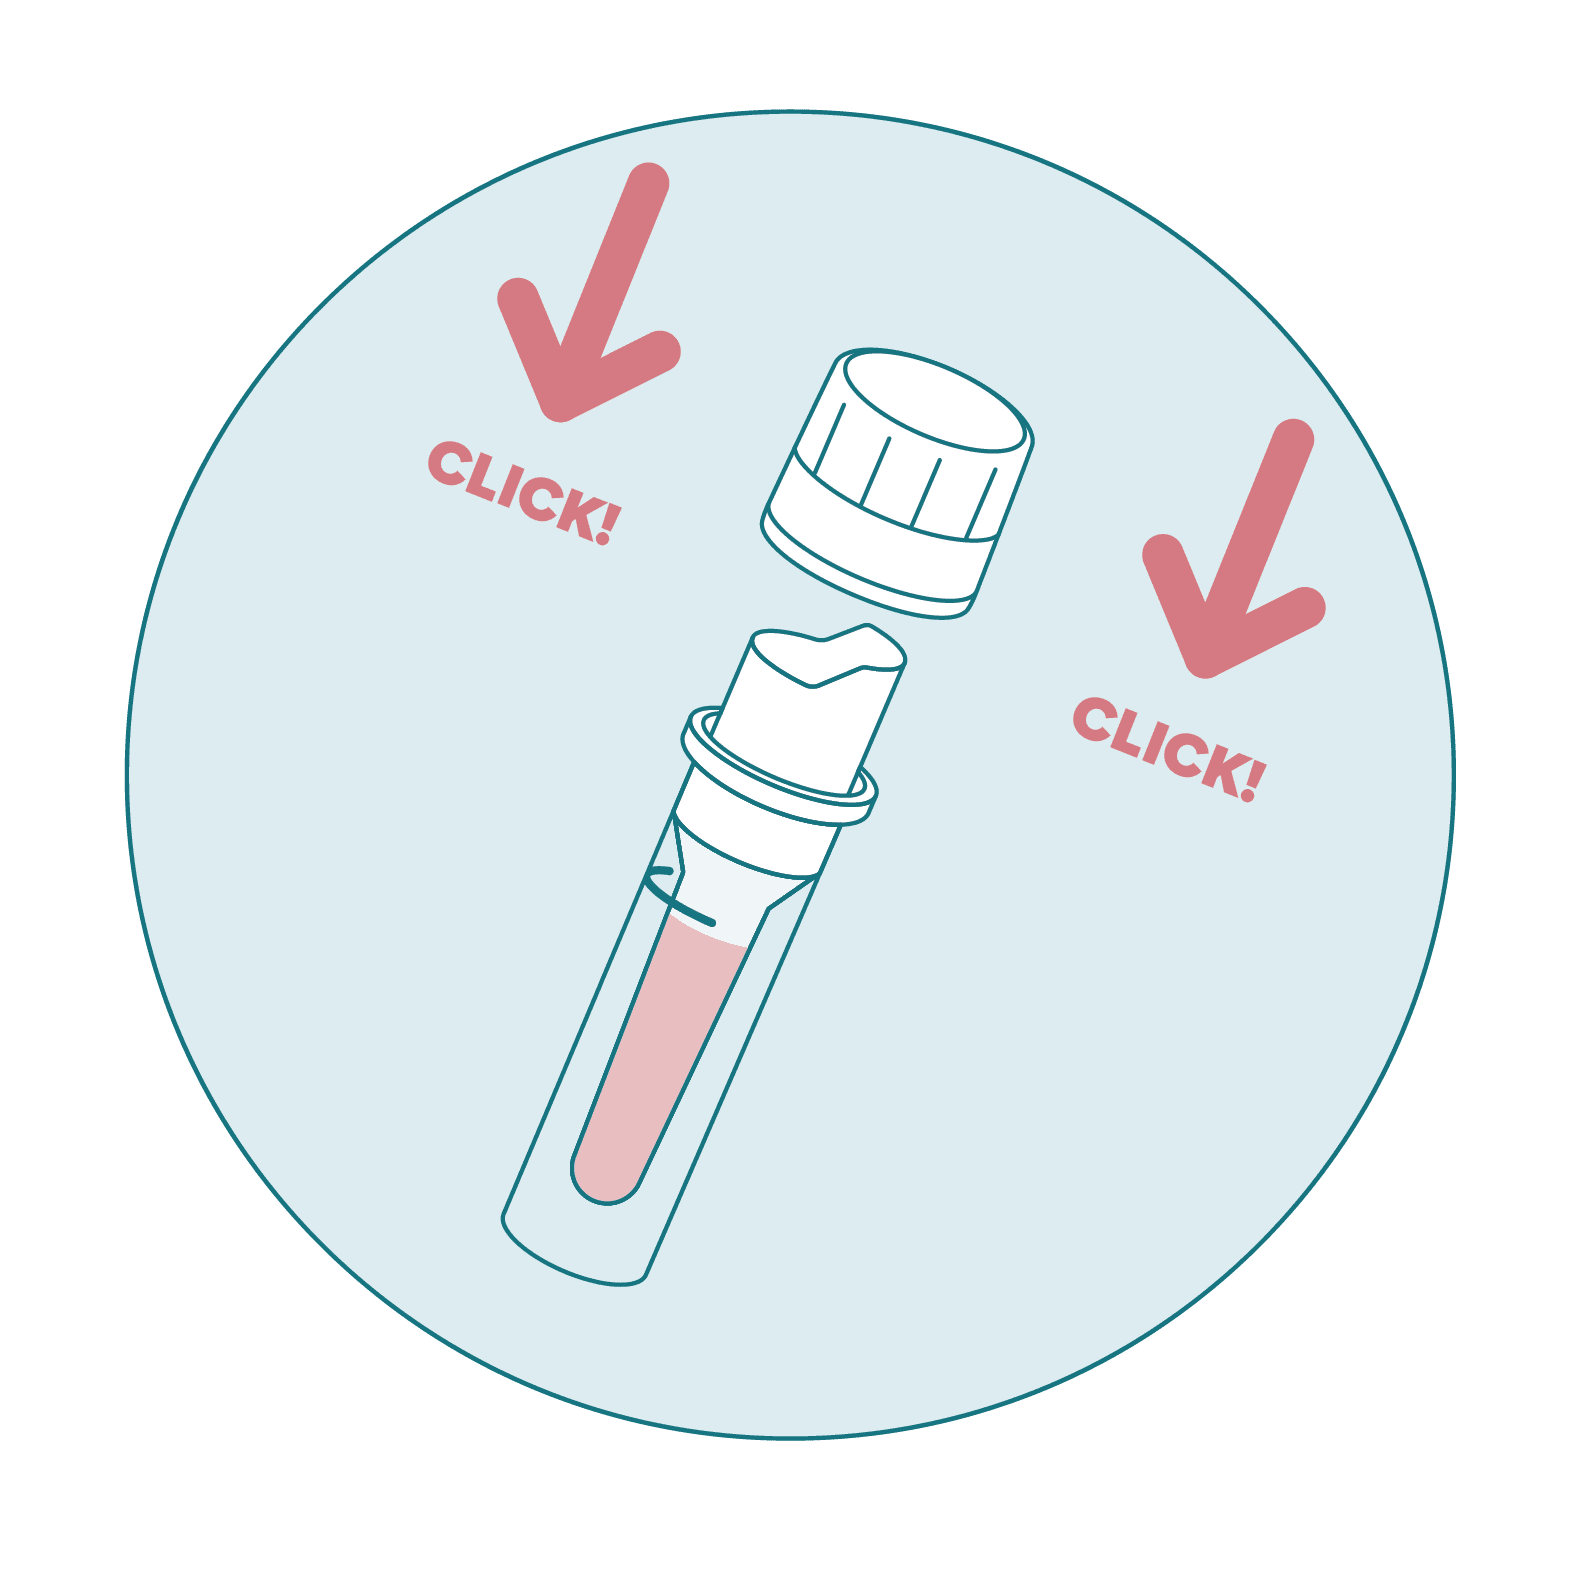
Once you have finished collecting your sample, remove the Phlebotic Assistant and apply the adhesive bandage to your finger. Replace the lid on the blood collection tube and press down firmly until you hear a click.
-
Mix your sample
Turn the tube upside down ten times to mix the sample. Ensure the blood collection tube is properly closed before you do this.
This is vital to ensure the sample is preserved for laboratory analysis. -
Place the biohazard bag into the kit box
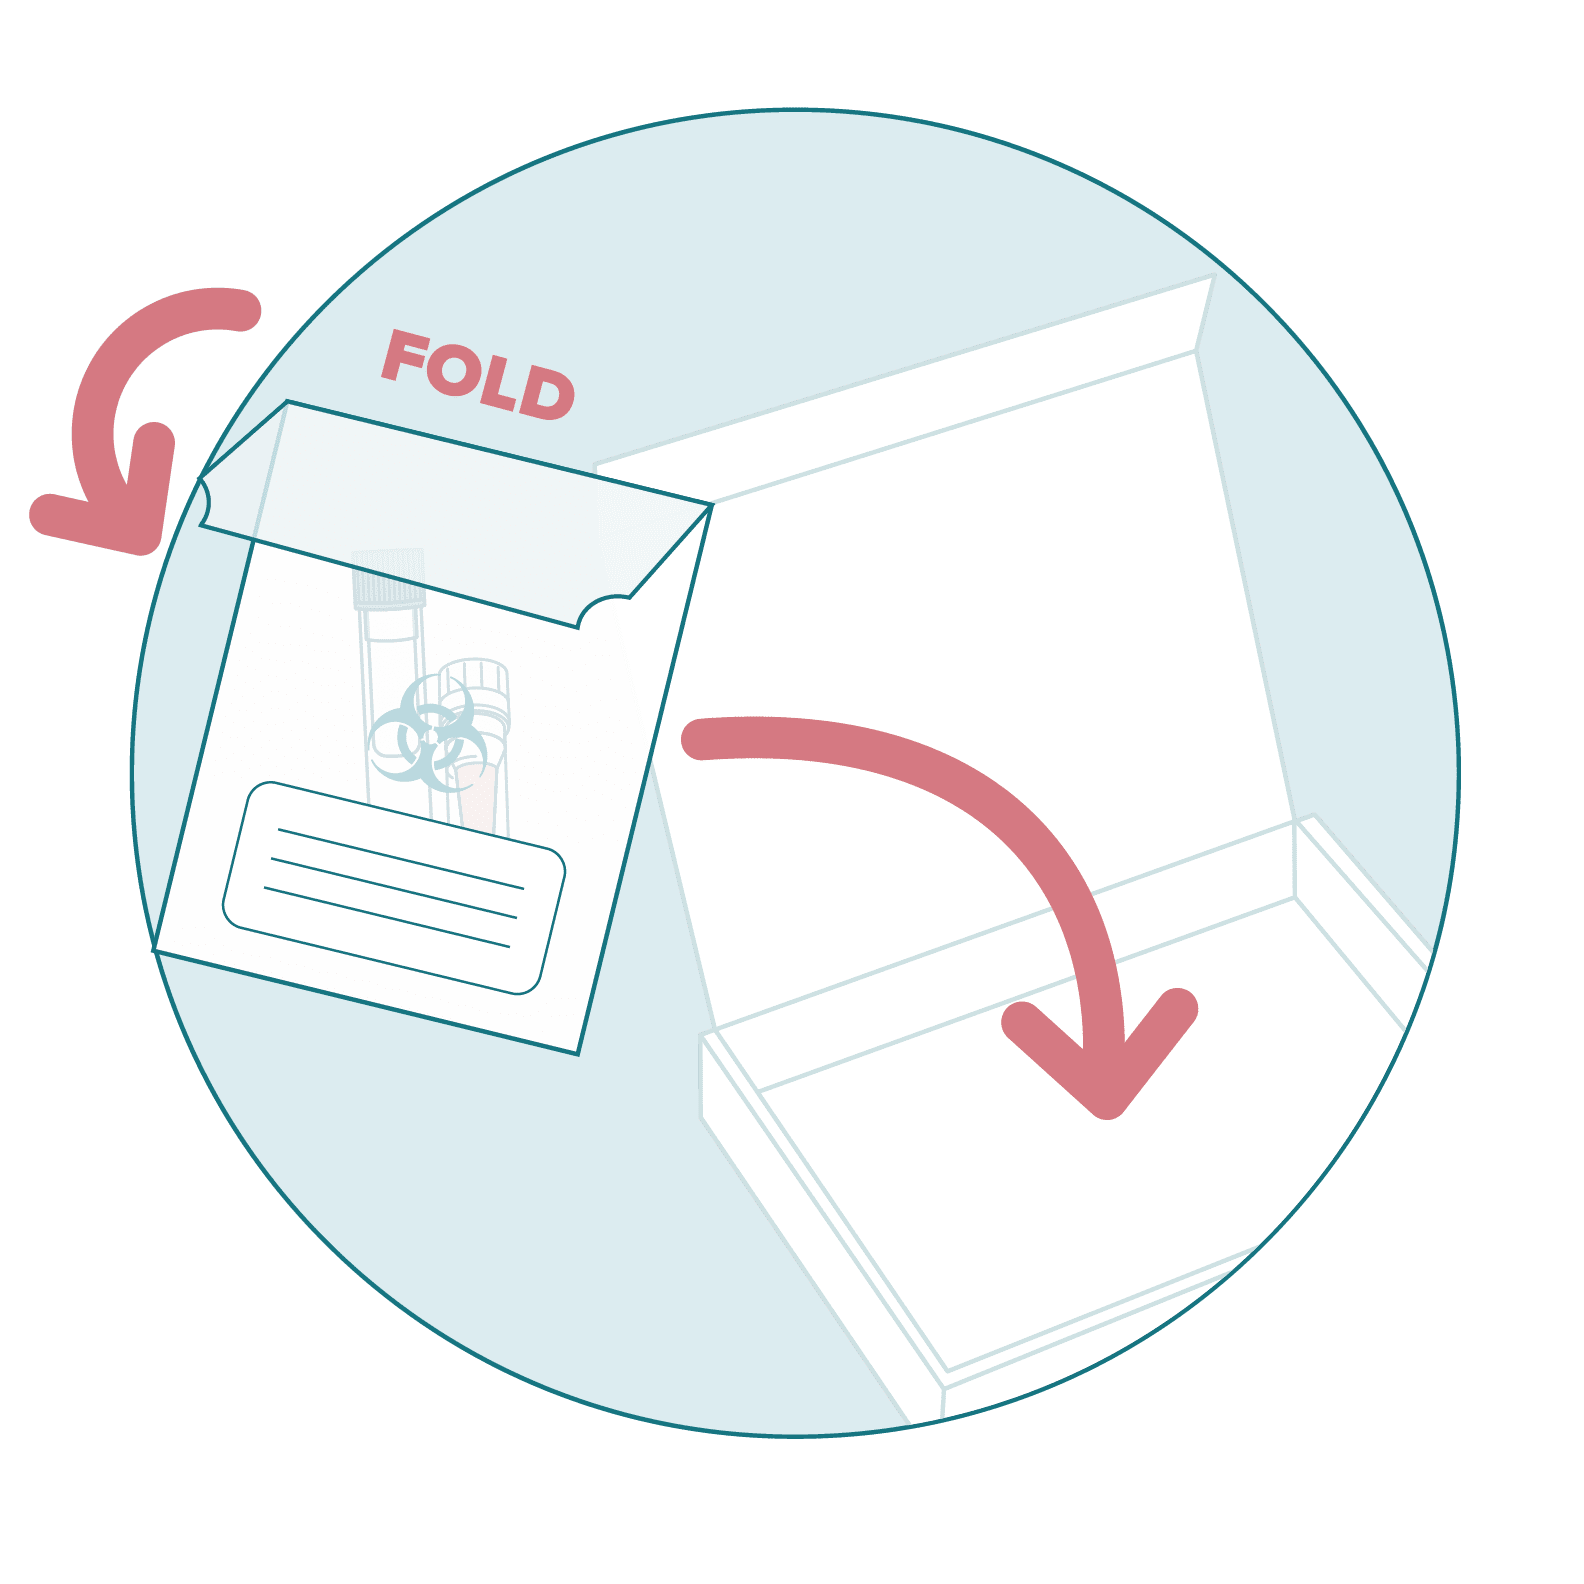
Place the sample tubes in the biohazard bag. Do not remove the white pad locate in the biohazard bag. To seal the biohazard bag, remove the plastic strip and fold down the flap. Place the biohazard bag back into the LetsGetChecked kit box. Ensure you have folded the biohazard flap to seal it.
Ensure you have completed the label which is located on the biohazard bag.
-
Return your samples
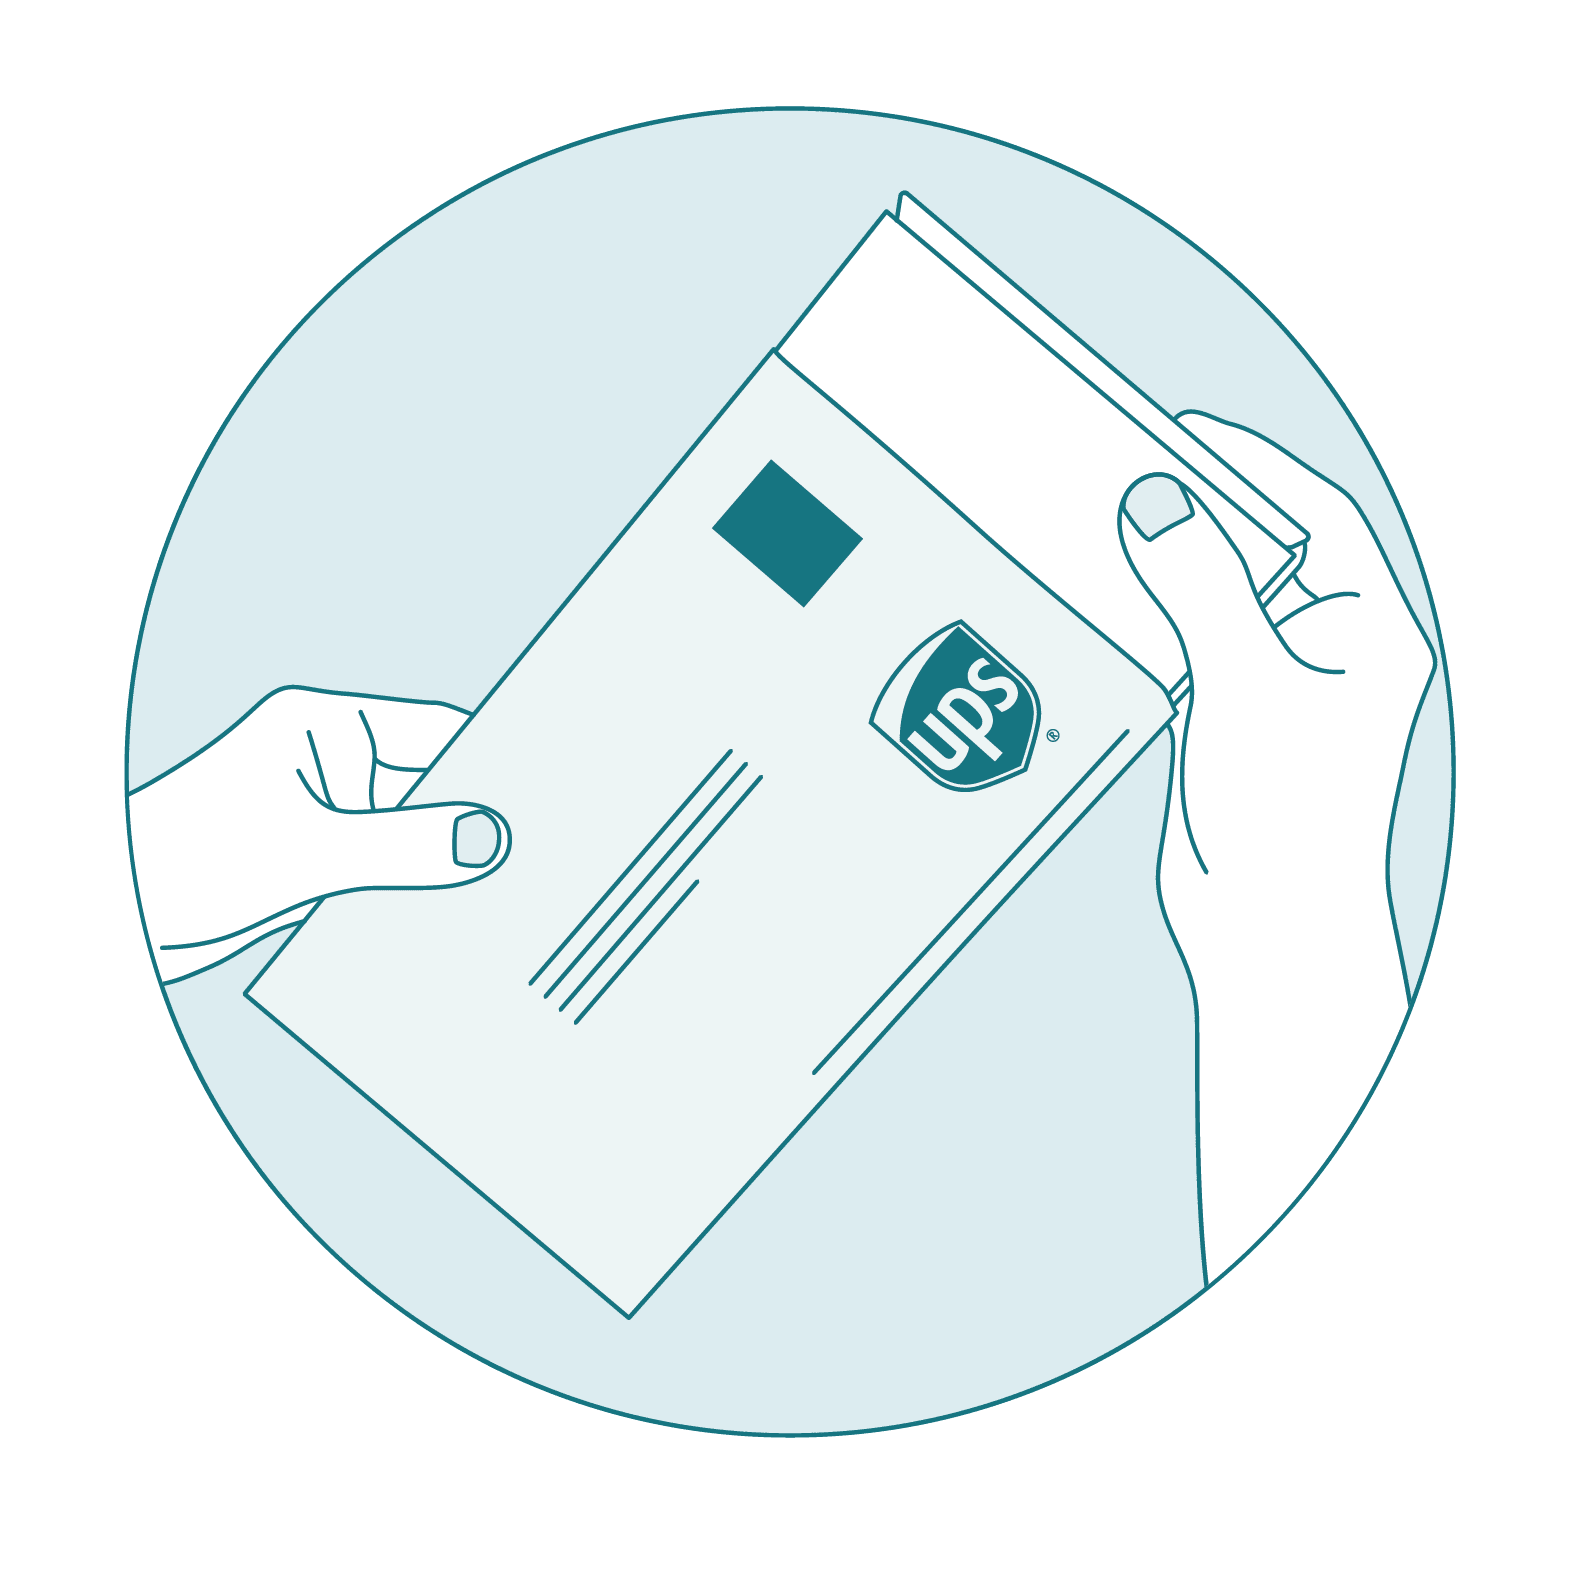
Place the kit box in the return envelope provided. Check your return label for return information and send the samples back on the same day.